Why is Excel Showing Formulas Instead of Results?Ways to fix this issue


The formula bar in Excel is a very useful tool.
It can do various functions such as calculating mathematical equations, performing Excel formulas, or just simply containing the values of the cell.

That said, has it ever happened to you that you type in a formula in Excel but then the results don’t show?
If not, it may happen to you whether by accident or with intentions.
For example, take a look at this:

Believe it or not, this is a quite common occurrence that a lot of users experience.
So if it happened to you, don’t panic.
There are easy fixes to this situation depending on what caused it.
If it hasn’t happened to you yet, pat yourself on the back. But please still read on so that you’ll know what you can do if it ever happens to you.
That’s right. In this article, we will be learning how to fix the issue of Excel showing formulas instead of results.
There are several reasons why this can occur. So first, let’s go over these possible reasons why Excel is showing formulas instead of results.
Why is Excel Showing Formulas Instead of Results?
So you input a formula in the formula bar and expect to get a result.
But when you pressed enter, the cell didn’t show the result.
Instead, it showed the formula that you inputted. What gives?
Here are the possible reasons why this could happen:
- The Show Formulas function is enabled
- The cell that contains the formula is formatted as Text
- Excel thinks of the formula as text since it has an apostrophe (‘) at the beginning
- The formula doesn’t have an equal sign (=) at the beginning
- There is space before the formula
- The formula is wrapped in quotation marks (“”)
For every cause, there is a fix. Let’s go over how to fix the issue of Excel showing formulas instead of results
The “Show Formulas” Function is Enabled
The Show Formulas function commands Excel to show formulas (rather than results) in all cells that contain them.
This is useful if you want to see all formulas that are contained in cells within the worksheet. You may want to review certain formulas, or it may be for auditing reasons.
To enable the Show Formulas function, you will have to click the Show Formulas button on the Formulas tab in Excel.
It doesn’t seem that you’ll do this by accident right? By default, it is the Home that is open.
So you will have to intentionally open the Formulas tab just to click the Show Formulas button.

However, this function has an easy-to-accidentally press keyboard shortcut.
The keyboard combination Ctrl + ` enables the Show Formulas function.
Pressing this keyboard shortcut is probably the reason why the Show Formulas function is enabled.
How To Fix This Issue

There are two ways to fix this issue. The first (and easier way) is to press Ctrl + ` on your keyboard.
This should disable the Show Formulas function, and the results should show now. The other way is to click the Show Formulas button.
- Open the formulas tab. To do so, click the tab as follows:

- Press the Show Formulas button. This will disable the Show Formulas

- The cells should show results now instead of formulas.

Cell Format is Set to Text
Cells formatted as text are another cause of Excel showing formulas instead of results.
This shouldn’t happen if you’ve inputted the formulas before formatting the cells as text.
However, if the cells are already formatted as text before you input the formulas, they will show the formulas rather than the results.

Fortunately, this issue has an easy fix.
How To Fix This Issue
- Select the cell or cells that are showing formulas instead of results. If you want to select all the cells in the worksheet, press the keyboard shortcut Ctrl + A.
- Open the Home tab (this is the default open tab when you open an Excel workbook). To do so, click the tab as follows:

- You should see a drop-down menu that will show the cell format. Since the cell is formatted as text, it will show Text.

- Click the drop-down menu. It should show you cell format options. Select General or the appropriate number format (we’ll select General for this example).

- The selected cell/s should show the result now instead of the formula.

Apostrophe (‘) At The Beginning of The Formula
If you add an apostrophe at the beginning of a cell, anything that follows after it (the apostrophe) will be treated as a text string.
Be it an actual text string, number, or formula, if it has an apostrophe at the beginning, Excel will treat it as text.

You may have accidentally typed an apostrophe at the beginning of the formula.
As such, the cell will show the formula (which is treated as text) rather showing the result.
Or you could be getting a data dump from a database that automatically adds an apostrophe at the beginning.
Fortunately, this is an issue that is easy to fix.
How To Fix This Issue
The obvious way is to manually remove the apostrophe.
This will result in the formula functioning properly.

However, this can be tedious if you’re dealing with a large number of cells.
There is another way though, and it is through using the Replace function.
- Select the cell or cells that are showing formulas instead of results. If you want to select all the cells in the worksheet, press the keyboard shortcut Ctrl + A.
- Press the keyboard shortcut Ctrl + H to open the Find and Replace dialog box. Alternatively, you can click the Find & Select button from the Home tab.

- In the textbox after Find what, input an apostrophe (‘).

- Leave the textbox after Replace with as blank.

- Click the Replace All button.

- This should fix the formulas that have an apostrophe at the beginning. Do note that this will remove all apostrophes in all the selected cells. If there are any apostrophes in between the formulas, input ‘= in the textbox after Find what. Then in the text box after Replace with, input an equals sign (=).

The Formula Has No Equal Sign (=) At The Beginning
For Excel to treat a formula as a formula, it needs to have an equal sign (=) at the beginning.
Otherwise, Excel will treat it as a text string.

How To Fix This Issue
To fix this issue, you will have to manually input an equal sign (=) at the beginning of the formula.
This is the only way.
Unlike the case with the apostrophe at the beginning of the formula, we cannot use the Replace function on this one.

The Formula Has Space Before the Equal Sign
Same as with the apostrophe at the beginning of the formula, having space before the equals sign will result in Excel treating it as a text string.
This is because it breaks the rule that all formulas should have the equals sign (=) at the beginning.

How To Fix This Issue
To fix this issue, you will have to remove the space(s) before the equals sign of any formula.
You can either do this manually or use the Replace function.
- Select the cell or cells that are showing formulas instead of results. If you want to select all the cells in the worksheet, press the keyboard shortcut Ctrl + A.
- Press the keyboard shortcut Ctrl + H to open the Find and Replace dialog box. Alternatively, you can click the Find & Select button from the Home tab.
- In the textbox after Find what, input an equals sign with a space before it ( =).
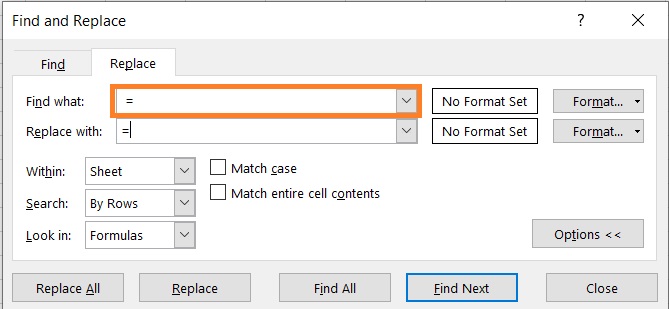
- In the textbox after Replace with, input an equals sign (=).
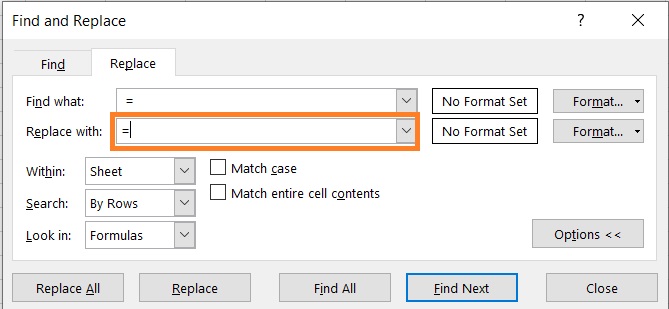
- Click the Replace All button.

Do note that if there are cells that have more than one space before the equal sign, this wouldn’t work on them. You’ll have to manually remove the extra spaces.
The Formula is Wrapped in Quotation Marks (“”)
In Excel, if you wrap a number or formula in quotation marks, it will be treated as a text string.
As such, when a formula is wrapped in quotation marks, it will not show the result.
Rather, the cell will show the formula.

How To Fix This Issue
To fix this issue, you will have to manually remove the quotation marks wrapping the formula.
Unfortunately, the Replace function isn’t effective for this issue.
Conclusion
And that wraps up this article. I’ve shown you the possible causes of Excel showing formulas instead of results and how fix them.
Hopefully this will help you when you’re working on your Excel Workbooks.