How to Remove Page Breaks in ExcelDo you want to remove Page Breaks in Excel? Here's how!


Page breaks in Excel are nifty tools that indicate where in an Excel sheet or workbook pages break.
It’s especially useful if you intend to print the sheet or workbook.
With page breaks, you would know what portion of the sheet or workbook is included on page 1, page 2, page 3, and so on.
They will typically appear in Excel as dotted lines.

However, while they’re useful if you intend to print your Excel sheet or workbook, they can be annoying when you just want a clear view.
And if you’re presenting your Excel sheet or workbook in a meeting, you probably don’t want those dotted lines to appear.
They can be quite distracting and may cause your audience to miss out on important data.
You wouldn’t want that, do you?
If you’re not intending to print your Excel sheet or workbook, you probably want to remove those page breaks.
But the question is, how do you do it?
And that’s what this article is all about.
We will be learning how to remove page breaks in Excel, whether they were automatically or manually added.
We will also go over how and why page breaks appear in Excel.
Let’s get started!
How and Why Do Page Breaks Appear in Excel?
When you open a new Excel sheet or workbook, page breaks usually don’t appear.
This means that unless you do certain actions, they won’t appear. One way to make them appear is to enter the Page Break view.
It can be accessed by clicking the Page Break Preview button on the View tab.

Excel will automatically insert page breaks when you first enter the Page Break view.
These page breaks are inserted based on certain parameters such as margin, size, paper size, margin, etc.
Excel will want to ensure that each page contains an optimal number of rows and columns.
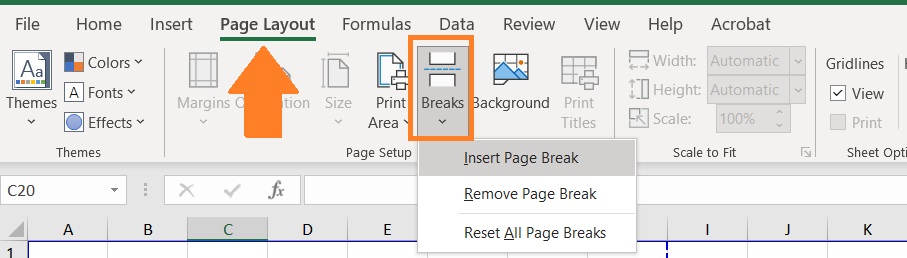
Another way to make them appear is to manually add them. This can be accessed on the Page Layout tab.
You only have to click the Breaks button and choose the Insert Page Break option.
You can also manually add page breaks by clicking and dragging automatically added page breaks.
Page breaks will appear differently depending on whether they are manually or automatically added.
They will also appear differently depending on the view.
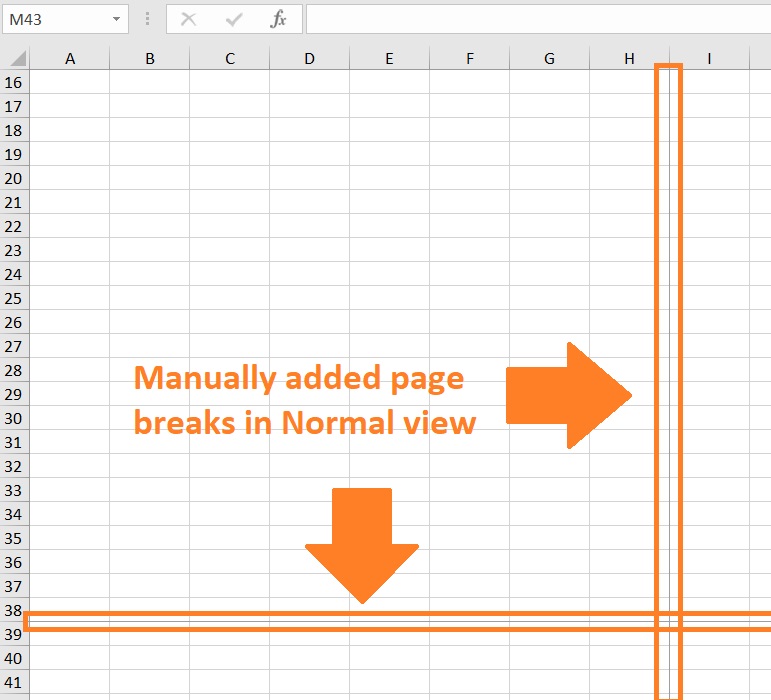
In Normal view, a page break automatically added by Excel will appear as a grey dotted line.
They’re not overly noticeable.

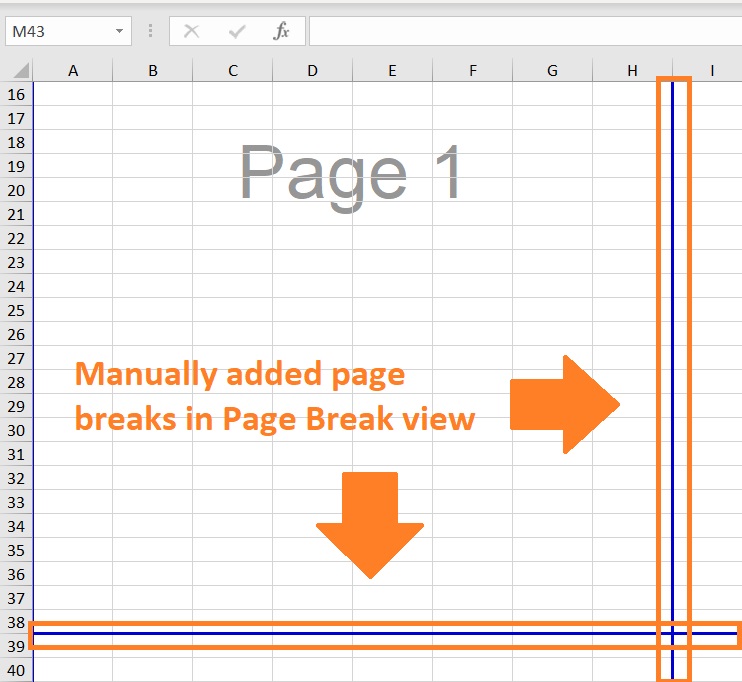
In Page Break view, a page break automatically added by Excel will appear as a blue dashed line.
It will also be emphasized compared to how it appears in normal view, which makes it more noticeable.

In Normal view, a manually added page break will appear as a solid grey line. Same as with an automatically added page break, it isn’t overly noticeable.
In Page Break view, a manually added page break will appear as a bold solid blue line. It’s also more noticeable compared to how it appears in Normal view.
Removing Page Breaks in Excel
There are three ways you can remove page breaks in Normal view.
One way is to remove certain page breaks. Another is to reset all page breaks.
Both these options can be accessed from the Breaks button. The last way is to edit the settings of the sheet so that page breaks won’t appear anywhere on the sheet.
The first two methods also apply in Page Break view.
There are also additional ways you can remove page breaks in Page Break view.
Unfortunately, you can only remove manually added page breaks in Page Break view. Automatically added page breaks will always appear in this view mode.
Removing Certain Page Breaks
If you only want to remove certain page breaks, then this method works best for you.
Removing a Vertical Page Break
- Select a cell that is to the right of the page break that you want to remove. Alternatively, you can select the column to the right of the page break.

- Open the Page Layout tab. Click the “Breaks” button. This will present you with several options. Select the “Remove Page Break” option. This will remove the vertical page break.

Removing a Horizontal Page Break
- Select a cell that is immediately below the page break that you want to remove. Alternatively, you can select the row that is immediately below the page break.

- Open the Page Layout tab. Click the “Breaks” button. This will present you with several options. Select the “Remove Page Break” option. This will remove the vertical page break.
Simultaneously Removing Vertical and Horizontal Page Breaks
- Select the cell that is immediately on the bottom right where the horizontal and vertical page breaks intersect.

- Open the Page Layout tab. Click the “Breaks” button. This will present you with several options. Select the “Remove Page Break” option. This will remove the vertical page break.
Remove All Manually Added Page Breaks
The first method can be tedious if you want to remove all manually added page breaks in your sheet.
Fortunately, there is a more efficient way to do so. All you have to do is to reset all page breaks.
To do so, you’ll have to open the Page Layout button. Then click the “Breaks” button.
This will present you with several options. Select the “Reset All Page Breaks” option.
This should remove all manually added page breaks in your sheet.

There’s also an alternative way to do so in Page Break view.
Just right-click on any cell while in Page Break view.
You’ll be shown several options. Select and click the “Reset All Page Breaks” option.
This should also remove all manually added page breaks in your sheet.

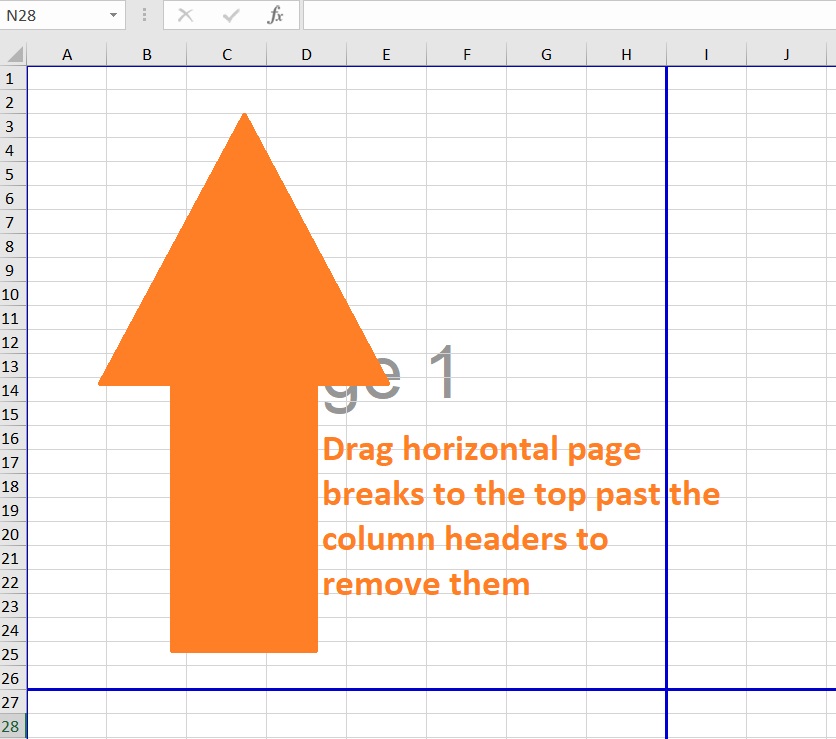
Dragging Page Breaks (in Page Break View)
This method only works in Page Break view.
You can remove page breaks by dragging them.
For vertical page breaks, you’d have to drag them to the left past the row headers.

For horizontal page breaks, you’d have to drag them to the top past the column headers.
Make Automatically Added Page Breaks Disappear (In Normal View)
The above methods only work for manually added page breaks.
Automatically added page breaks will still appear even if you reset all page breaks.
One way to stop these page breaks from appearing is to close and reopen your Excel workbook without saving.
However, this can be undesirable if you already made edits to the Excel sheet or workbook.
Another way to stop automatically added page breaks from appearing is to edit Excel settings.
- Open the File tab.

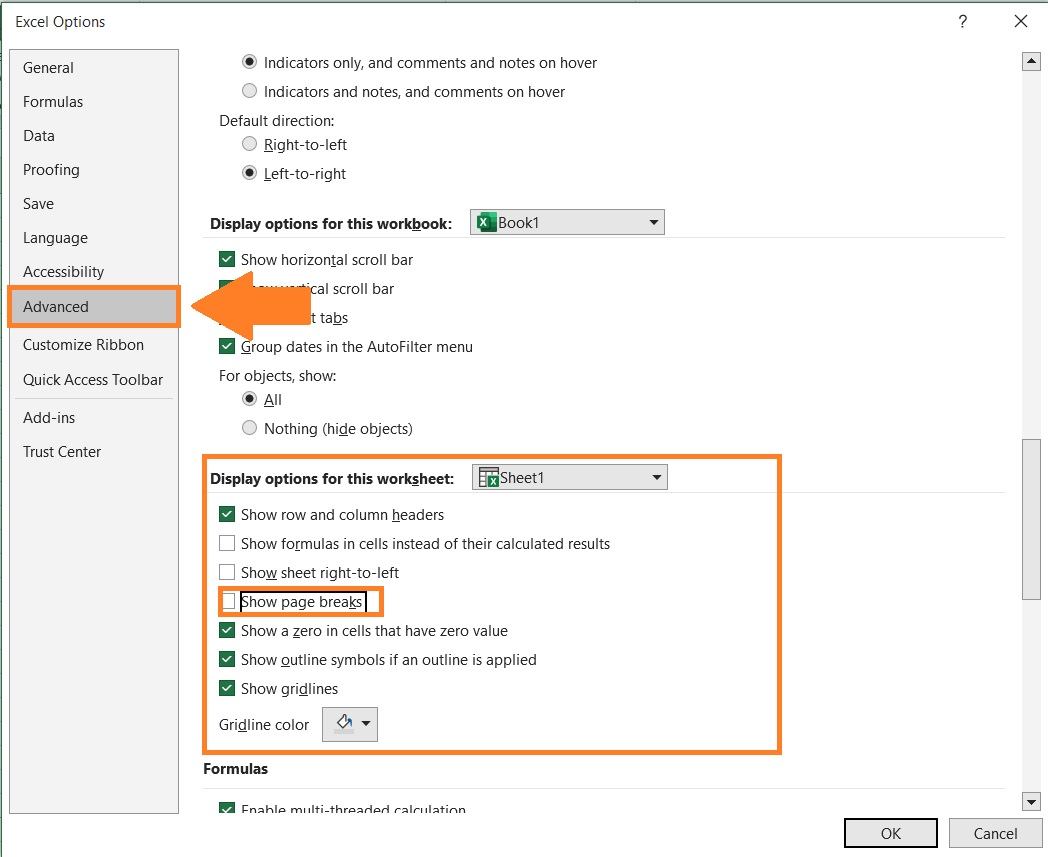
- On the File tab, click the Options button. This will open the “Excel Options” dialog box.

- Select the “Advance” category (which you can find on the left side of the dialog box). Navigate until you arrive at the “Display options for the worksheet” section. Untick the box beside “Show page breaks”. This should make all automatically added page breaks not show on the Excel sheet.
- Click the OK button.
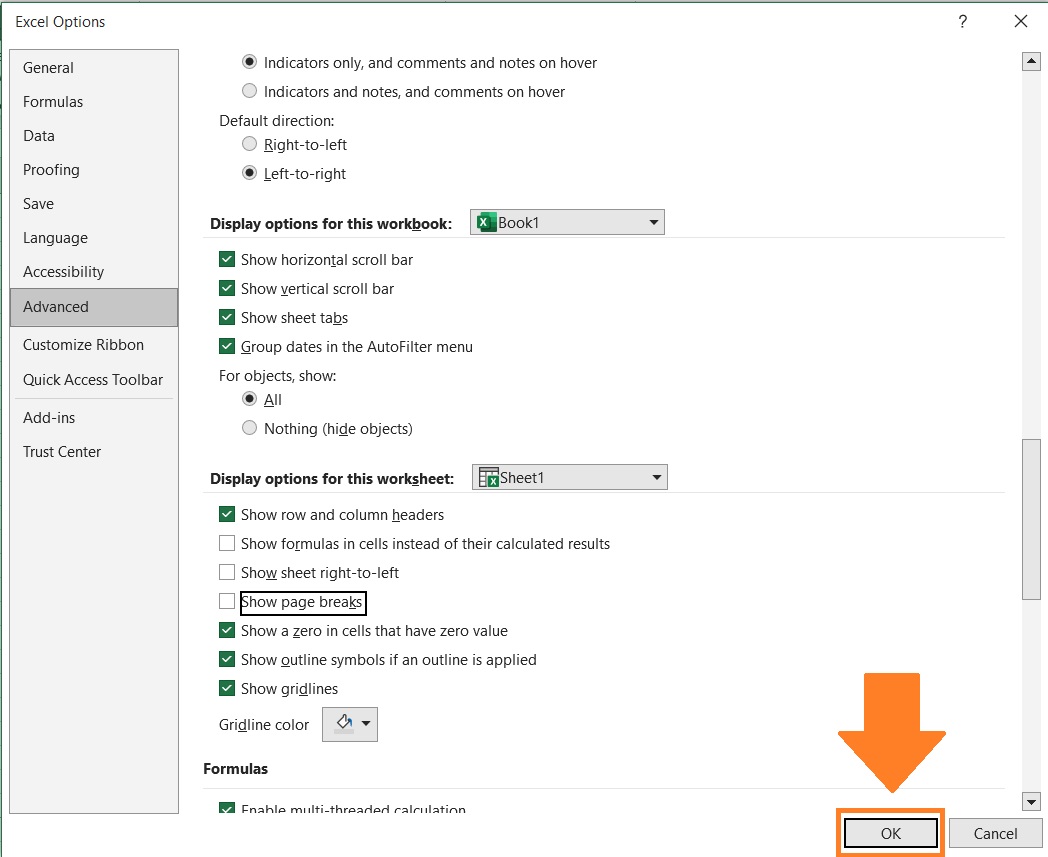
This should make all the automatically added page breaks stop appearing anywhere on the sheet.
Do note though that this only works in Normal view. Automatically added page breaks will always appear in Page Break view.
Also, do note that this change in setting only applies to the Excel workbook that you’re working on.
You’d have to edit the settings anytime you open a new Excel workbook or one where the settings still show page breaks.
Conclusion
In this article, I’ve shown you several ways to remove page breaks in Excel.
Page breaks don’t normally appear unless you make them.
That’s why it’s handy to know how to remove them.