Delete Hidden Columns and Rows in ExcelLearn how to efficiently delete hidden columns and/row in Excel


When you work with a huge amount of data, such as a worksheet that has tons of columns or rows, you may sometimes hide some columns or rows to make the worksheet easier for the eyes.
By doing so, you’ll see only the data that you plan to work on.
It also ensures that you won’t touch/modify the data or formula in the hidden columns or rows.
It’s a good alternative if only want to see particular columns or rows but don’t want to delete any data.
However, in some cases, when you’re done working with the sheet, you might want to permanently delete the data in the columns and/or rows that you (or another user) hid.
Manually deleting the hidden columns and/or rows is fine if there are only a few of them.
But if there’s a ton of them scattered across the sheet, it can be tedious to find and delete each one of them.
Thankfully, there is an inbuilt function in Excel that allows you to delete all hidden columns and rows in a very efficient manner.
Aside from that, you can also insert VBA macro codes to delete hidden columns and/or rows within a certain range.
In this article, we will be discussing how to delete hidden columns and rows in Excel.
By the end of the article, you should be able to efficiently delete hidden columns and/or rows in Excel whenever you have to do so.
Let’s get started.
Use Inspect Document to Delete Hidden Columns and/or Rows
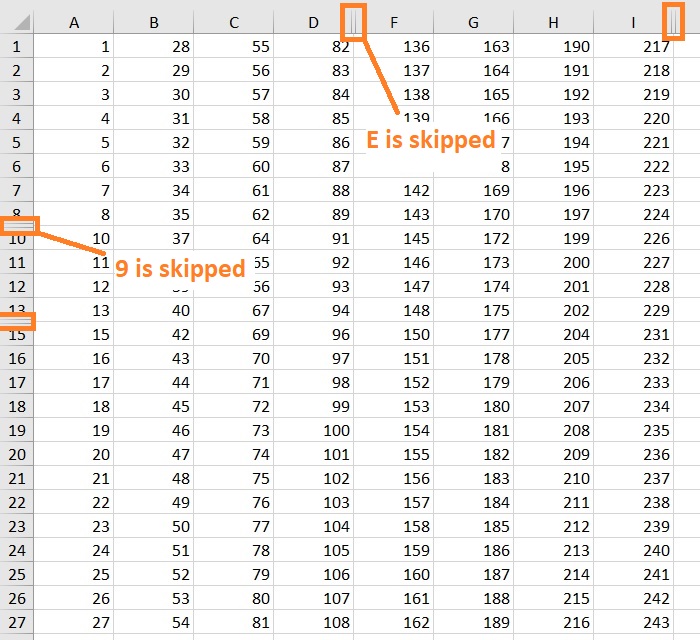
Suppose you’re working with this sheet:

This sheet has hidden columns and rows. Notice how some columns and rows have double lines?
And how some numbers (for row headers) or letters (for column headers) are skipped?
These are telltale signs that a sheet has hidden columns or rows.
Suppose you want to delete these hidden rows and columns.
And to do so, you’ll be using Excel’s Inspect Document feature.
How to Delete All Hidden Rows and Columns
- Open the File Tab. This will open the File menu.

- In the File menu, click on Info. This will show various information about the workbook that you’re working on. It also has buttons that allow you to perform various actions such as protecting your workbook, inspecting your workbook, etc.

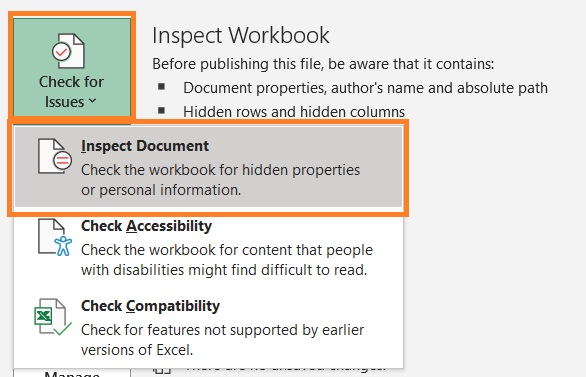
- Click on the Check for Issues button (beside Inspect Workbook). This will present you with several options. Select Inspect Document from among them.
- Excel will prompt you to save your file. This is because if you remove data via Inspect Document, the deletion is permanent. You can’t undo the deletion. As such, I suggest that you save your file so that you have a back-up if you want to restore the data removed via Inspect Document. (Click the Yes button if you want to save your file before proceeding. Otherwise, click the NO button)

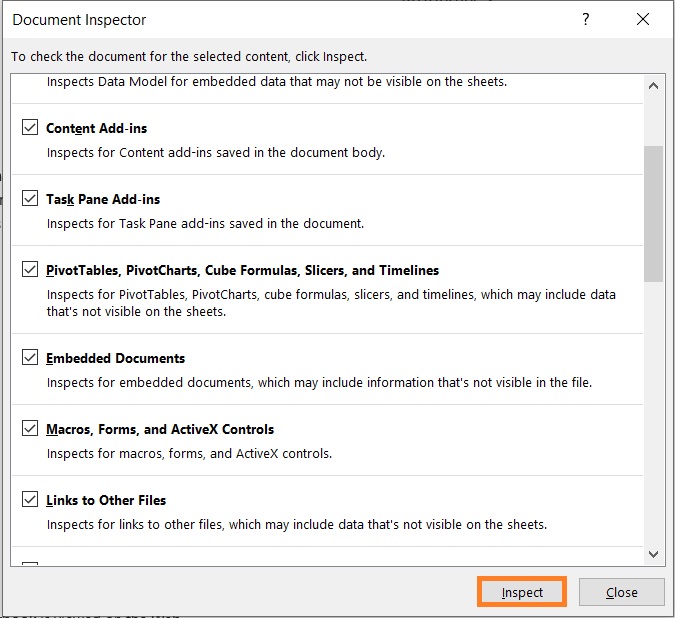
- The Document Inspector window should now be open. Click the Inspect button.
- In the inspection results, navigate to “Hidden Row and Columns”. It should be at the very bottom of the window. This section will show you how many hidden columns and rows the workbook has. If the workbook has hidden columns and/or rows, this section will have a red exclamation point. It will also have a Remove All button.
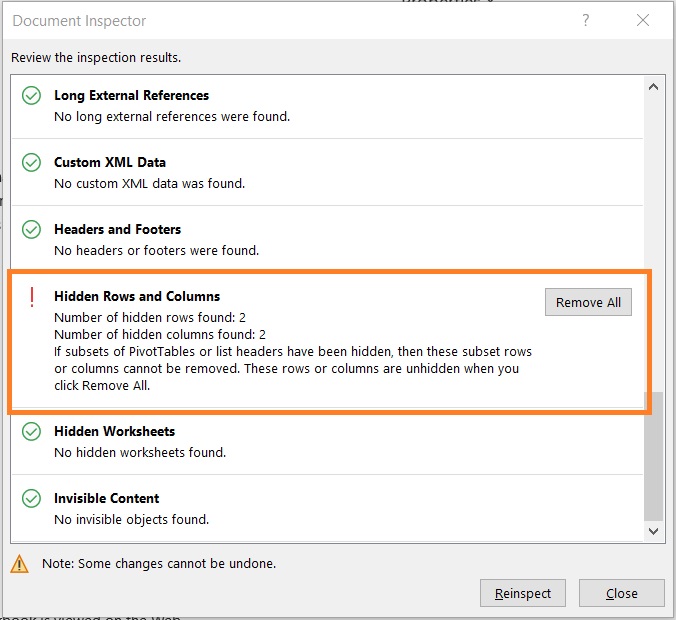
- To delete all hidden columns and rows, you only need to click the Remove All button.

Things to Note
- This method will remove all hidden columns and rows within the entire workbook, not just the active worksheet. This means that if multiple worksheets have hidden columns and rows, all of them will be deleted.
- This method will not delete subsets of PivotTables or list headers. It will only unhide them.
- The deletion via this method is permanent. You cannot undo it via the keyboard shortcut Ctrl + Z. It is recommended that you create a backup save of the workbook you’re working on.
Use VBA Code to Delete Hidden Columns and/or Rows
The previous method doesn’t give you much flexibility.
It always deletes hidden columns AND rows within the entire workbook.
This means that it doesn’t allow you to only delete hidden columns. It doesn’t allow you to only delete hidden rows.
Also, it doesn’t allow you to delete hidden columns and/or rows from just one sheet.
As such, the previous method isn’t the best one to use if you only want to delete hidden columns or rows within a particular sheet.
Your only option here is to use VBA codes.
I’ll be providing you with some VBA codes that will allow you to delete hidden columns and/or rows within a particular worksheet.
Delete Hidden Rows (Used Range) Within a Worksheet
Below is the VBA code for deleting hidden rows within a worksheet (used range):
Sub DeleteHiddenRows()
Dim sht As Worksheet
Dim LastRow
Set sht = ActiveSheet
LastRow = sht.UsedRange.Rows(sht.UsedRange.Rows.Count).Row

For i = LastRow To 1 Step -1
If Rows(i).Hidden = True Then Rows(i).EntireRow.Delete
Next

End Sub
What this VBA code does is find the last used row (a row that has data in it) and assign its row number as the LastRow.
The VBA code then uses the last row number to perform a For Next loop where it starts from the last row, then checks whether the row is hidden or not.
If it is, then the code will delete the row.
If it’s not, then the code will not delete the row and will proceed to check whether the above row is hidden or not.
This process will continue to loop until the first row.
Delete Hidden Columns (Used Range) Within a Worksheet
Below is the VBA code for deleting hidden columns within a worksheet (used range):
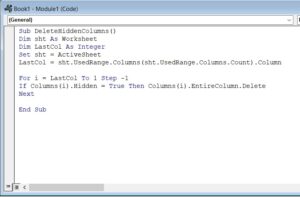
Sub DeleteHiddenColumns()
Dim sht As Worksheet
Dim LastCol as Integer
Set sht = ActiveSheet
LastCol = sht.UsedRange.Columns(sht.UsedRange.Columns.Count).Column

For i = LastCol To 1 Step -1
If Columns(i).Hidden = True Then Columns(i).EntireColumn.Delete
Next

End Sub
What this VBA code does is find the last used row (a column that has data in it) and assign its column number as the LastCol.
The VBA code then checks whether the last column is hidden or not.
If it is, then the code will delete the column. If it’s not, the column will stay as is.
It does this for every column of the sheet from the last used column to the first (used or not).
Delete Hidden Columns and Rows (Used Range) Within a Worksheet
Below is the VBA code for deleting hidden columns and rows within a worksheet (used range):
Delete Hidden Columns and Rows (Used Range) Within a Worksheet
Below is the VBA code for deleting hidden columns and rows within a worksheet (used range):
Sub DeleteHiddenRowsColumns()
Dim sht As Worksheet
Dim LastRow as Integer
Dim LastCol as Integer
Set sht = ActiveSheet
LastRow = sht.UsedRange.Rows(sht.UsedRange.Rows.Count).Row
LastCol = sht.UsedRange.Columns(sht.UsedRange.Columns.Count).Column

For i = LastRow To 1 Step -1
If Rows(i).Hidden = True Then Rows(i).EntireRow.Delete
Next

For i = LastCol To 1 Step -1
If Columns(i).Hidden = True Then Columns(i).EntireColumn.Delete
Next

End Sub
This VBA code basically combines the previous codes. It performs separate loops on the sheet’s rows and columns.
It will delete any hidden columns and rows that it finds along the way.
This VBA code basically combines the previous codes.
It performs separate loops on the sheet’s rows and columns. It will delete any hidden columns and rows that it finds along the way.
How to Insert VBA Code
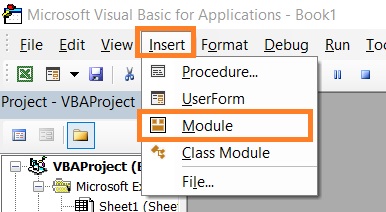
- Open the Developer tab. Then, click on the Visual Basic button. This will open the VBA window.

- In the VBA window, click on Insert. Then, click on Module.
- In the Module window, paste/insert the code that you need. (In this illustration, I inserted the code to delete hidden columns)
- To run the code, press F5 or click on the play button.

Things to Note
- If you want easy access to the codes anytime, you may save the workbook as an Excel file that lets you store macros. You may also save the codes in your personal macro workbook
- Any changes made by the code cannot be undone. It is recommended that you create a backup save of the workbook you’re working on.
Conclusion
And those are the ways to delete hidden columns and rows in Excel.
The above methods are much more efficient than deleting hidden columns and/or row one by one.
You should now be able to efficiently delete hidden columns or rows whenever you have to.