Adding Gridlines to Your Excel PrintoutsDo you want those gridlines to appear on your Excel printouts? Here's how!


When you open a new Excel sheet or workbook, you’ll probably see these gray lines:

These grey lines in Excel are what we refer to as gridlines.
Their purpose is to help you, the user, identify the area that a cell occupies.
This way, you’ll know where a cell starts and ends. It also makes the data you’re working on easier to read. Pretty helpful, right?
So let’s say that you’re done working with your sheet and you want to print it.
You want the gridlines to appear when your print your sheet so that it makes reading the data easier. However, when you try to print it, here’s what you see:
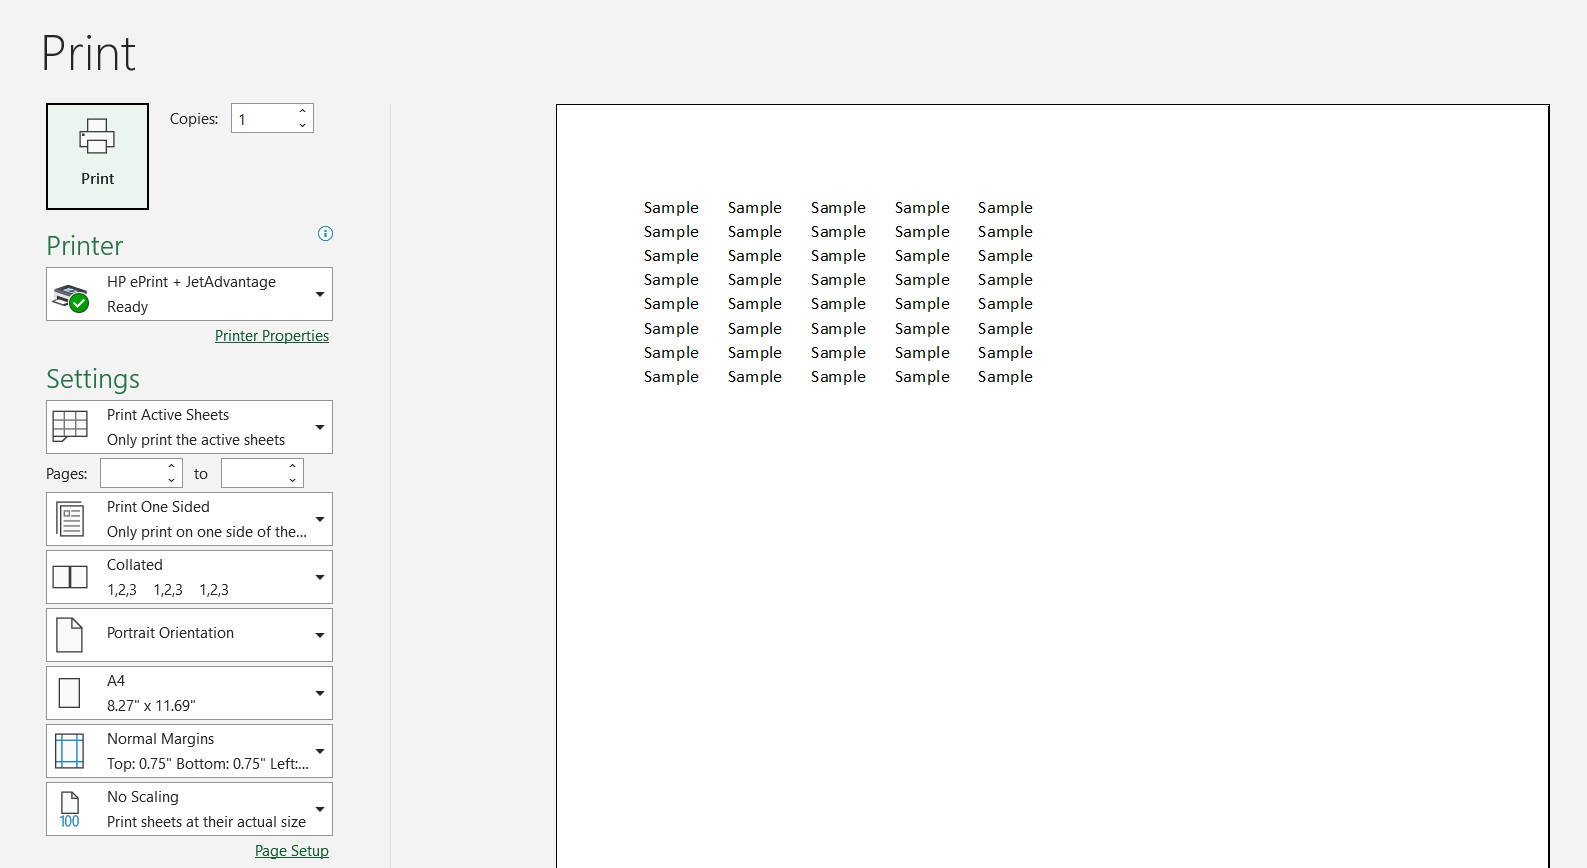
There’re no gridlines! What gives?
This is because, by default, the gridlines in Excel don’t come with the printout when you print an Excel sheet.
So if you want your printout to come with gridlines, you’d have to manually set them.
In this article, we’ll be discussing several ways you can add gridlines to your printouts in Excel.
And no, adding borders to your cells isn’t one of them (although we’ll consider it as one of our troubleshooting options).
By the end of the article, you should be able to have your printed sheets come with gridlines whenever your want or need to.
Let’s get started.
Use Sheet Options to Print Gridlines in Excel
For the first method, let’s start with the quickest one. It involves using the Sheet Options group.
You can access it via the Page Layout tab.
It’ll be located somewhere in the middle of the ribbon:

This group contains two options (View and Print) each for Gridlines and Headings. You’ll be using this group to add gridlines to your Excel printouts.
How to Print Gridlines in Excel
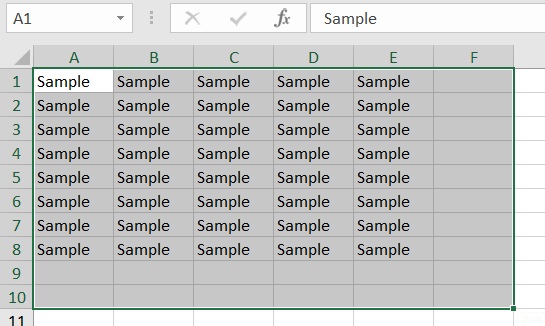
Suppose you want to print this area of your sheet:

You want the printout to come with gridlines.
To do so, you’ll be using the Sheet Options group.
- Select the area that you want to print.
- Open the Page Layout tab. In the middle of the ribbon, you should see the Sheet Options group.
- Under “Gridlines”, make sure that the box before “Print” is checked

- Your printout should come with gridlines now. To check, you can press the keyboard shortcut Ctrl + P to access Print Preview. Or you can open the File tab, then select Print from the menu.


- To print the sheet, just click the Print button.
Use the Page Setup Launcher Tool to Print Gridlines in Excel
The first method is the quickest of all the methods that we’ll be discussing in this article.
But this next method is the most versatile.
Aside from adding gridlines to your Excel printouts, you can also use this method to set margins, page orientation, and other page setup settings.
This method involves using the Page Setup Launcher Tool. This tool will open the Page Setup dialog box.
To access this launcher tool, you’ll have to open the Page Layout tab.
Then, somewhere on the left side of the ribbon, you should find this button:
 Clicking this button will open the page setup dialog box:
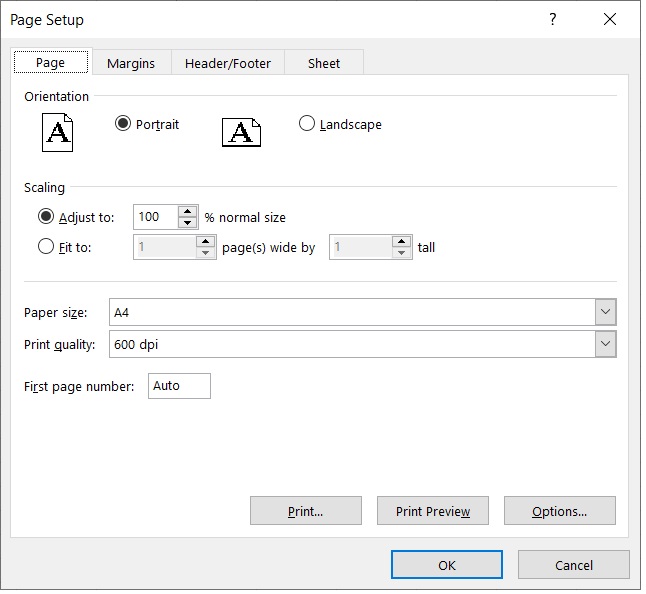
You can use this dialog box to set up the page for printing (like adding gridlines to the printout).
How to Print Gridlines in Excel
Suppose you want to print this area of your sheet:
You want the printout to come with gridlines.
To do so, you’ll be using the Sheet Options group.
- Select the area that you want to print.
- Open the Page Layout tab. Click the Page Setup Launcher tool which is located somewhere on the left side of the ribbon. This will open the Page Setup dialog box.
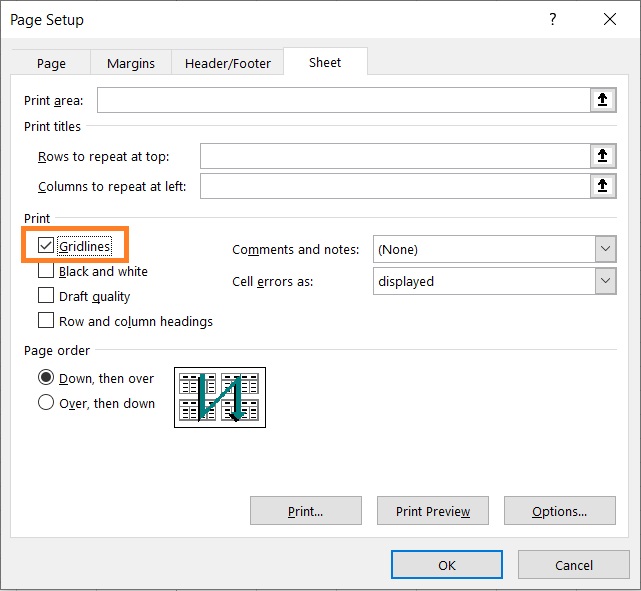
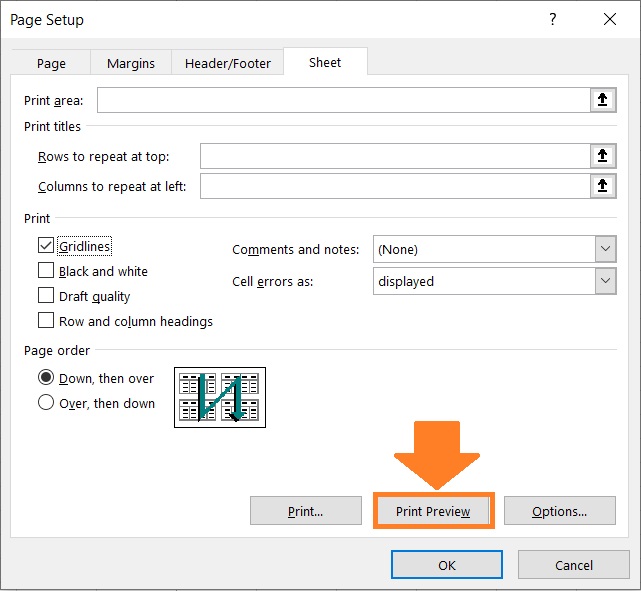
- In the Page Setup dialog box, open the Sheet tab.

- Under the Print category, make sure that the box before “Gridlines” is checked. This will add gridlines to your printout.
- To see the print preview, click the Print Preview button.
- To print the sheet, just click the Print button.
Now, while this method may not be the quickest method when you only want to add gridlines to your printout, it is the quickest if you want to set other page setup settings. So if you want to set other page setup settings, this is the preferred method to follow.
Print Gridlines in Excel from Print Preview Mode
This last method is the same as the previous method in that you’ll be using the Page Setup dialog box to add gridlines to your printout.
However, instead of accessing it via the Page Setup Launcher tool, you’ll be accessing it from Print Preview Mode.
How to Add Gridlines from Print Preview Mode
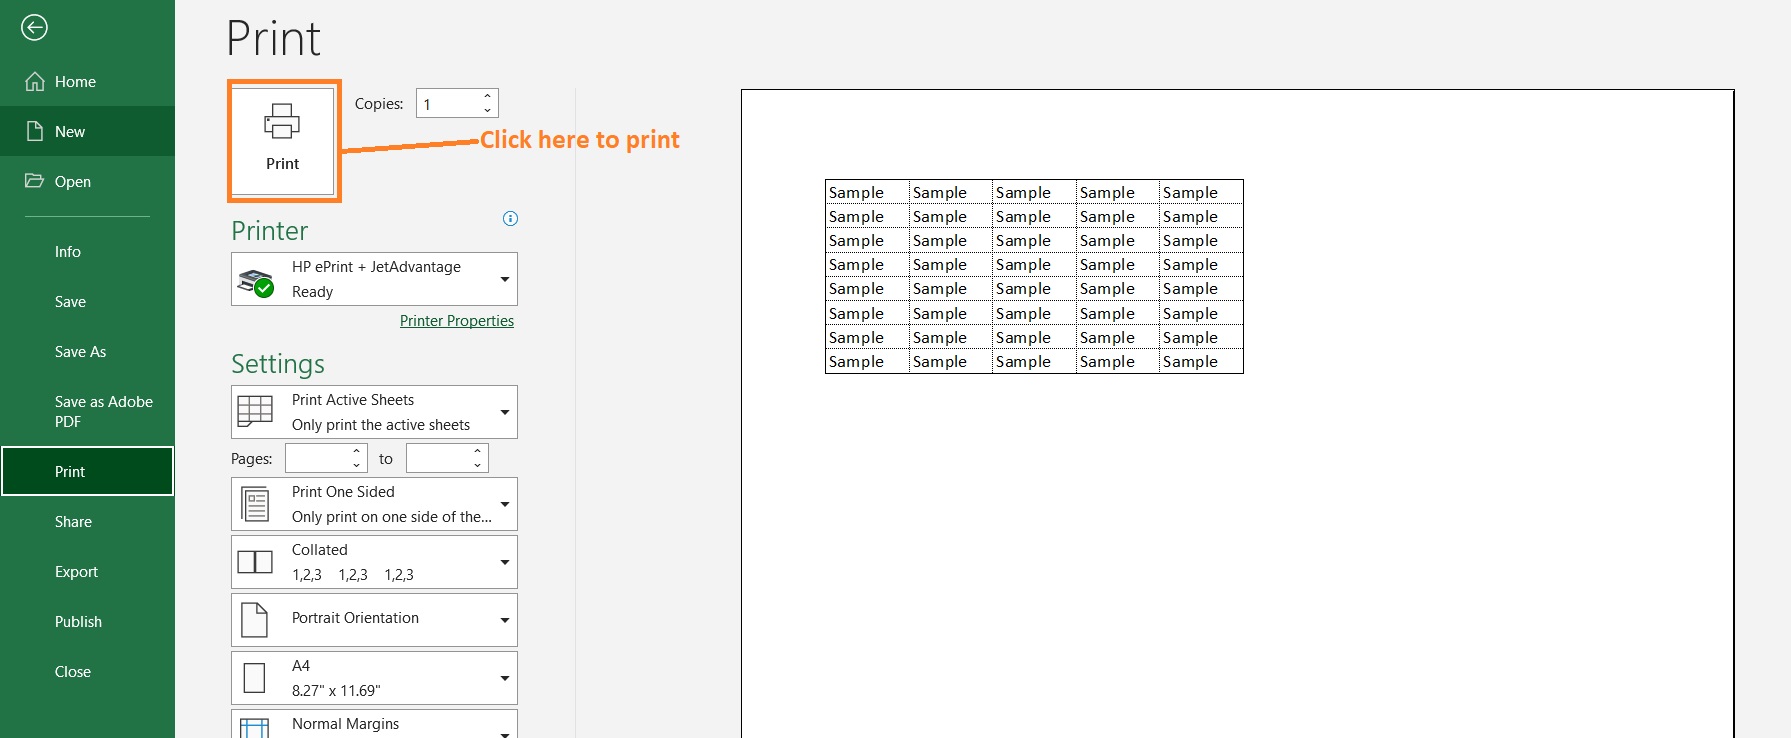
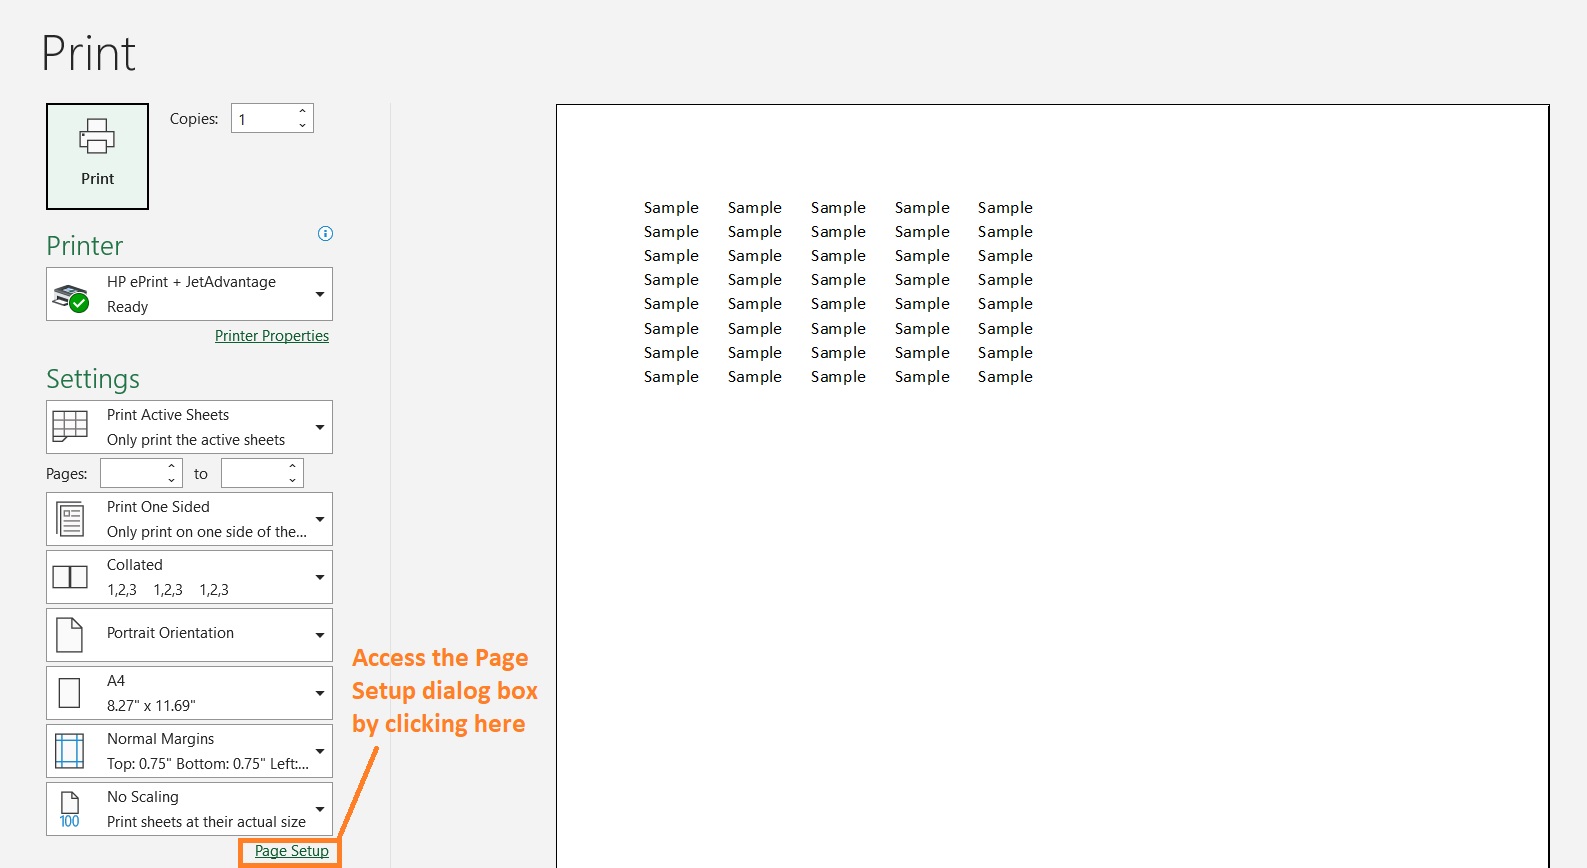
Suppose that you are in Print Preview Mode and this is what you see:
You want to add gridlines to your printout. To do so, you’ll be accessing the Page Setup dialog box from this menu.
- On the left side of the menu, you’ll see several options under “Settings”. Under these options, you’ll see a Page Setup link. Click on it to open the Page Setup dialog box.
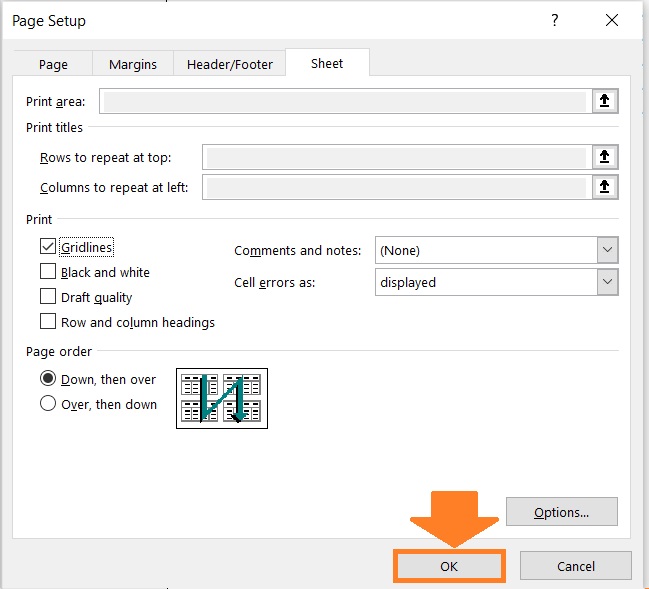
- In the Page Setup dialog box, open the Sheet tab.

- Under the Print category, make sure that the box before “Gridlines” is checked. This will add gridlines to your printout.

- To go back to Print Preview Mode, click the OK button.
- To print the sheet, just click the Print button.
Adding Gridlines Around Empty Cells
Gridlines are typically only added around actual data (i.e. cells that contain data).
If you want to add gridlines around empty cells, you’ll have to set your print area to include those cells.
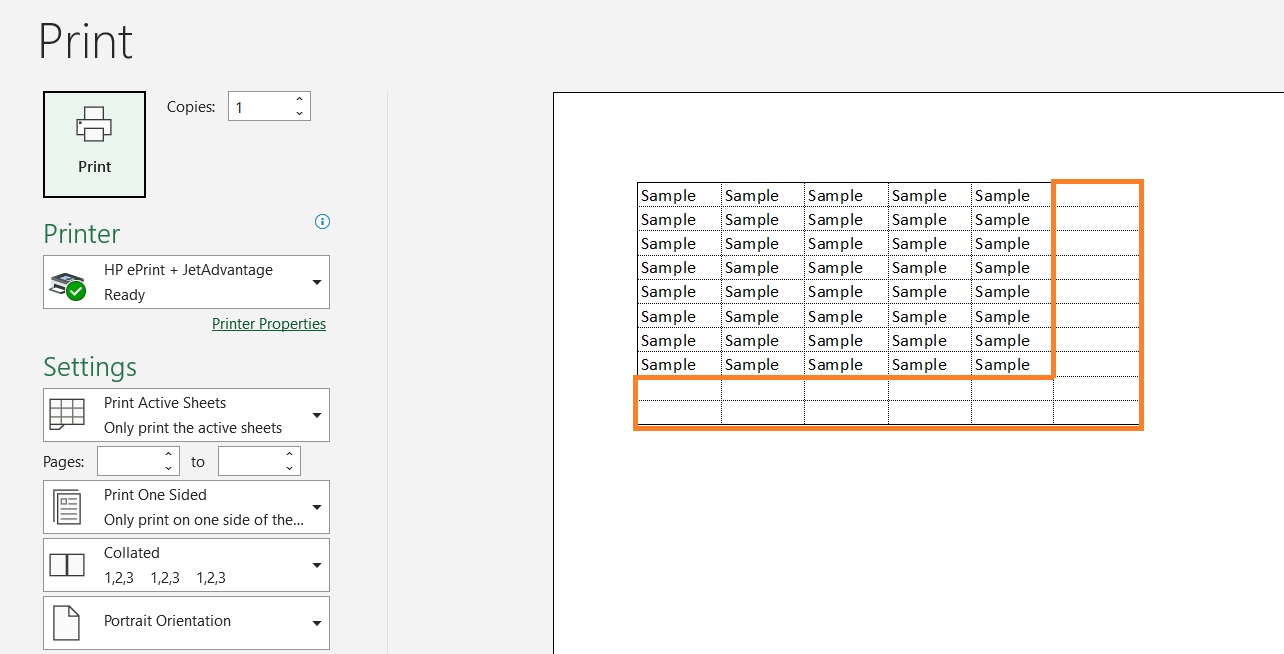
To do so, first select the area of the worksheet that you want to print (including the empty cells).
Then, open the Page Layout tab. On the left side of the ribbon, you should be able to see a Print Area button.
Click on it, then select Set Print Area to set your selection as your print area.

When you go to Print Preview Mode, you should now see that there are gridlines around your selected empty cells.
Troubleshooting Printing Issues with Printing Gridlines in Excel
If all of the three methods above don’t work, here are some things you can do to troubleshoot it:
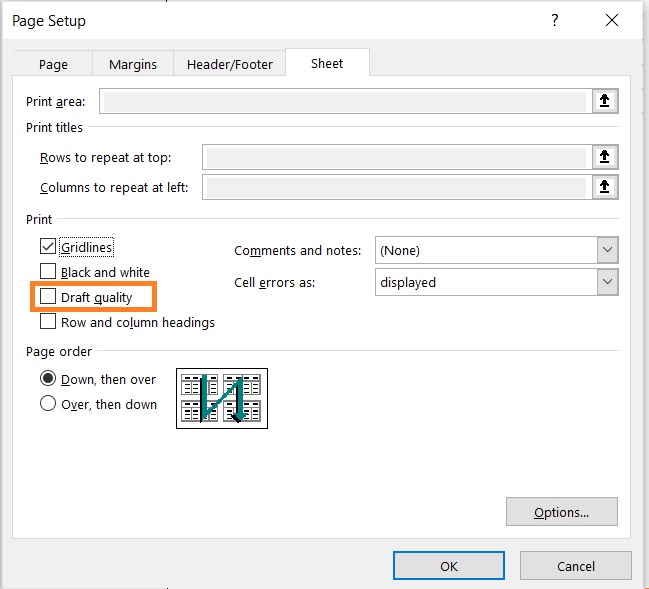
- Make sure that the box before “Draft Quality” isn’t checked. To check, open the Page Setup dialog box. Open the Sheet tab. Under the Print category, you should see a box before “Draft Quality”. Makes sure that it’s not checked.
- Add borders to your selection. First, select the area of the worksheet that you want to print. Open the home tab. You should see a button that adds borders to your selection. Click the dropdown arrow next to it, then select All Borders from the options.

- There might be issues with the printer driver. Try downloading the latest driver from your printer’s manufacturer’s website. This could fix the issues with the printer driver.
Conclusion
And those are the several methods to add gridlines to your Excel printout.
I hope that you’ll be able to use your learnings here in your future endeavors.