Split Each Excel Sheet Into Separate FilesStep-by-Step Guide
Excel workbooks are often divided up into many separate worksheets which contain unique information.
In many cases, simply dividing this information into distinct worksheets is enough, but sometimes it can be more convenient to work with distinct files instead, such as when working with information connected to a particular client.
You may think that this will require manually copying and moving the data into a new workbook, but fortunately, we can show you a better way.
Simply by following a few steps or entering a few lines of VBA code into the editor, you can split each worksheet off into its own separate file, which you can edit and save however you choose.
So, let’s get started!
How To Save the Currently Active Worksheet as a Separate File
If you would like to only save the currently active worksheet as a separate workbook, this is easy to do without any VBA code or any time-consuming copying and pasting.
This may be convenient if there is a limited amount of data you would like to share, or you work with a regularly updated file in which individual worksheets need to be shared over time.
Regardless of the reason, whenever you need to save a specific worksheet as a separate file, you can do so by following these steps.
- Right-click on the name tab for the worksheet you would like to copy.

- On the list of options, select “Move or Copy…” to open the “Move or Copy” dialog box.
- In the new dialog box, begin by checking the box next to “Create a copy” if you would like to retain the worksheet in the existing workbook as well as in a separate file of its own. Once you have chosen, select “Move selected sheets to Book:” and in the drop-down menu, select “(new book).”

- Now select “OK,” and Excel will open a new workbook with your selected worksheet. Click “File” and “Save” to save your new workbook to your desired folder.
As you can see, this is an extremely easy way to save your selected worksheet as its own file.
However, in some cases, you may want to save every worksheet in a given workbook as its own file, and in these cases doing so manually may be cumbersome and time-consuming.
However, by using VBA code, we can reduce the difficulty considerably.
Next, we will take a look at how we can do this quickly and easily.
Copying All Visible Tabs Into Unique Files With VBA
With this VBA code, we will look at how you can copy each visible tab into its own Excel file.
This is likely the most common situation in which you will need to split files, and fortunately, it is quite easy to do. Simply follow these steps.
- Designate a file folder where you would like each of the files you will create to be located. You may wish to create a new folder or simply designate an existing one for this purpose.
- Save the Excel file that contains each of the worksheets you would like to split into their own files in this file folder. This is necessary because the code we will use will acquire the location in which it will save the newly created files based on the folder in which the original file is saved.
- Create a backup copy of your file and ensure it is saved. This is crucial because you are working with VBA code; it is easy to cause errors that may result in the loss of your original worksheet if any accidents should occur in the process of entering the code.

- Open the VBA editor by selecting “Visual Basic” from the “Code” group and then select “Insert” and then “Module.” This will open a new window where you can enter code.
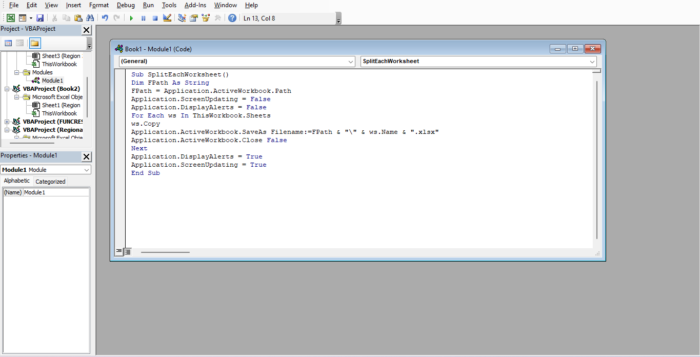
- In the code box, input this VBA code:
Sub SplitEachWorksheet()

Dim FPath As String

FPath = Application.ActiveWorkbook.Path

Application.ScreenUpdating = False

Application.DisplayAlerts = False

For Each ws In ThisWorkbook.Sheets

ws.Copy

Application.ActiveWorkbook.SaveAs Filename:=FPath & "\" & ws.Name & ".xlsx"

Application.ActiveWorkbook.Close False

Next

Application.DisplayAlerts = True

Application.ScreenUpdating = True

End Sub

- Run the code using the “play button” on the ribbon and check your file folder. Here you should find each of your worksheets saved as unique files.
Now that each of your files is saved separately, you can see that each of them has a file name that is identical to the sheet name it had when it was a part of the original workbook.
Also, now that you have entered a VBA code into your workbook, you will want to save it as a . xlsm file which allows macros to be enabled.
This allows you to save the macro and use it when you next open the file.
How To Split Visible Tabs Into Individual PDF Files With VBA
In some cases, you may need your information saved as a PDF instead of simply an Excel file.
This can make it easier to share with others and prevent it from being altered. This is where our current VBA code comes in.
By using this VBA code, we can save each as a PDF file, and here is how.
- In the same way as our first code, start by creating a backup file and saving your original file in the folder where you would like to have your final products saved. Each of the separate files that will be created will be saved in this file.

- Navigate to the “Developer” tab and select “Visual Basic” from the “Code” group to open the VBA editor.
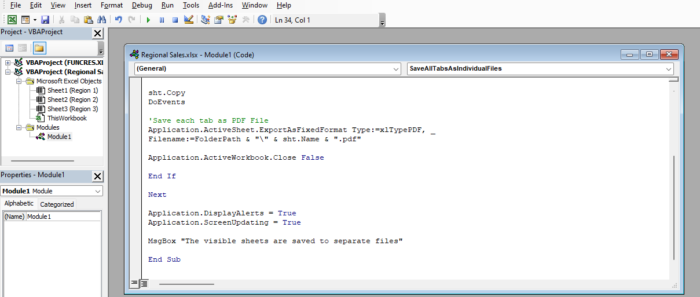
- In the VBA editor select “Insert” and then “Module.” This will open a new window where you can enter the following VBA code:
Sub SaveAllTabsAsIndividualFiles()

Dim FolderPath As String

Dim sht As Worksheet

FolderPath = Application.ActiveWorkbook.Path

Application.ScreenUpdating = False

Application.DisplayAlerts = False

For Each sht In ThisWorkbook.Worksheets

If sht.Visible = xlSheetVisible Then

sht.Copy

DoEvents

‘Save each tab as PDF File

Application.ActiveSheet.ExportAsFixedFormat Type:=xlTypePDF, _

Filename:=FolderPath & "\" & sht.Name & “.pdf”

Application.ActiveWorkbook.Close False

End If

Next

Application.DisplayAlerts = True

Application.ScreenUpdating = True

MsgBox “The visible sheets are saved to separate files”

End Sub

- Select the green “play button” to run the code, and this should bring up a dialog box letting you know that the files have been saved. Navigate to the folder and check to ensure that they have been correctly saved.

As with the previous method, if you would like to save the resulting macro, change the Excel workbook file type from .xlsx to .xlsm.
Conclusion
The ability to divide Excel workbooks up into separate worksheets is a powerful tool that can greatly increase organization and productivity.
However, when it becomes more convenient to separate these files into distinct files, it is important to know how to do so quickly and easily to avoid lost time and productivity.
Here we have taken a look at three different techniques you can use both with and without VBA code to get the job done.
