Copying an Excel Table to Word in 4 Simple Ways


Users of both Excel and Word will eventually face instances where they need to copy a table in Excel to Word.
While there are no options to convert Word to an Excel file, there is always the option of simply copying and pasting the table.
But here’s the catch: whatever you paste in Word is static. Whatever changes you do in Excel will not be updated in Word.
Let us explore the many ways for you to copy and paste a table from Excel to Word.
Plain Text Copy-Paste
This is the simplest method of copying and pasting an Excel table to a Word file.
You only have to select the table you wish to copy and then paste it into the Word document.
As already mentioned above, the catch is that the pasted table is static. You can make formatting changes or edit the information but these changes are only reflected in one place.
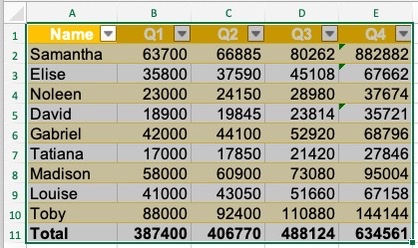
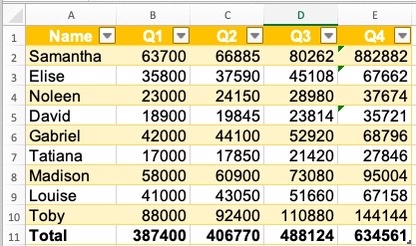
Take the image below as an example:

Here are the steps to copy and paste into Word:
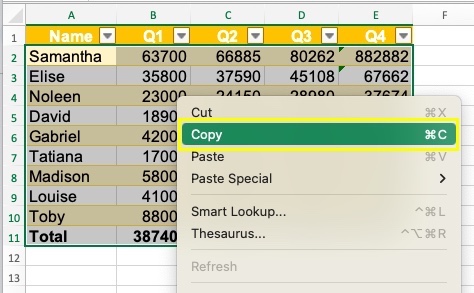
- Select the cells you wish to copy from Excel to the Word document.

- You can either press Ctrl + C (cmd + C for Mac users) or right-click on your mouse and click on Copy.

- Launch the Word document where you wish to paste the copied table.
- Once opened, place the cursor exactly where the table must be pasted. Press Ctrl + V (cmd + V for Mac users) or go to the Home table and click on Paste.


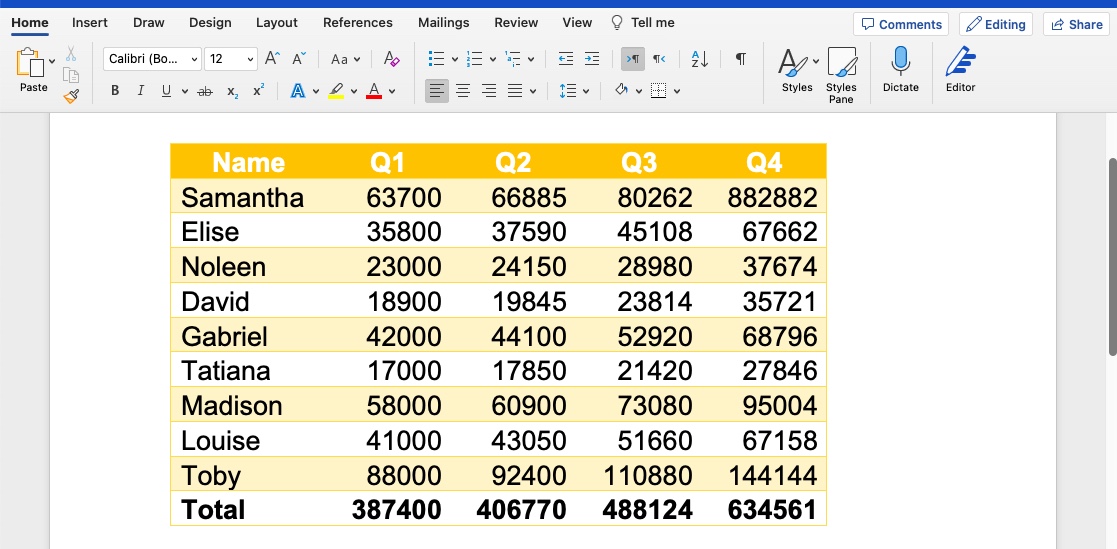
- Once pasted, the table will look like this in the Word document:

You may now begin editing the table in Word. However, take note of this important information when pasting a table from Excel to Word:
- Formulas in Excel are not copied to Word. This means that the SUM function or any other formulas used will not be available in Word. So when you make updates in Excel, you also have to manually change the data in Word.
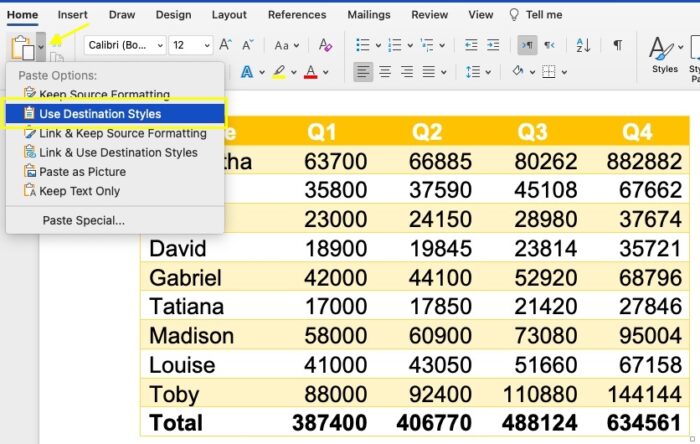
- When copy-pasting from Excel to Word, if there is any table formatting used, this will also be pasted into Word. If you do not wish to use the same format, simply select Use Destination Style.

Embed as a Linked Object
A simple copy-paste makes the data in Word static. Here, there is an option for linking the two tables.
The advantage? You don’t have to manually update both files each time.
If you are working with large data, this can come in really handy. This also avoids the possibility of making mistakes. Any information you change in Excel is updated in Word in real-time.
Let’s start working on this.
Assuming we still use the same example above:
Follow these steps:
- Select the cells you wish to copy from Excel to the Word document.
- You can either press Ctrl + C (cmd + C for Mac users) or right-click on your mouse and click on Copy.
- Launch the Word document where you wish to paste the copied table.
- Once opened, place the cursor exactly where the table must be pasted. In the Home tab, there is a small arrow button near the Paste icon. Click on this.


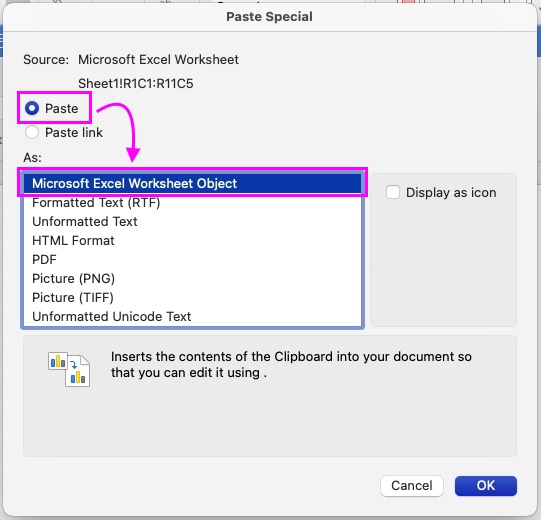
- Click Paste Special.
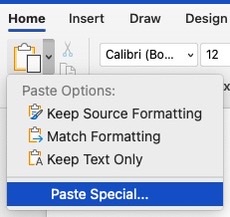

- Select Paste Link in the Paste Special dialog box and then select Microsoft Excel Worksheet Object.

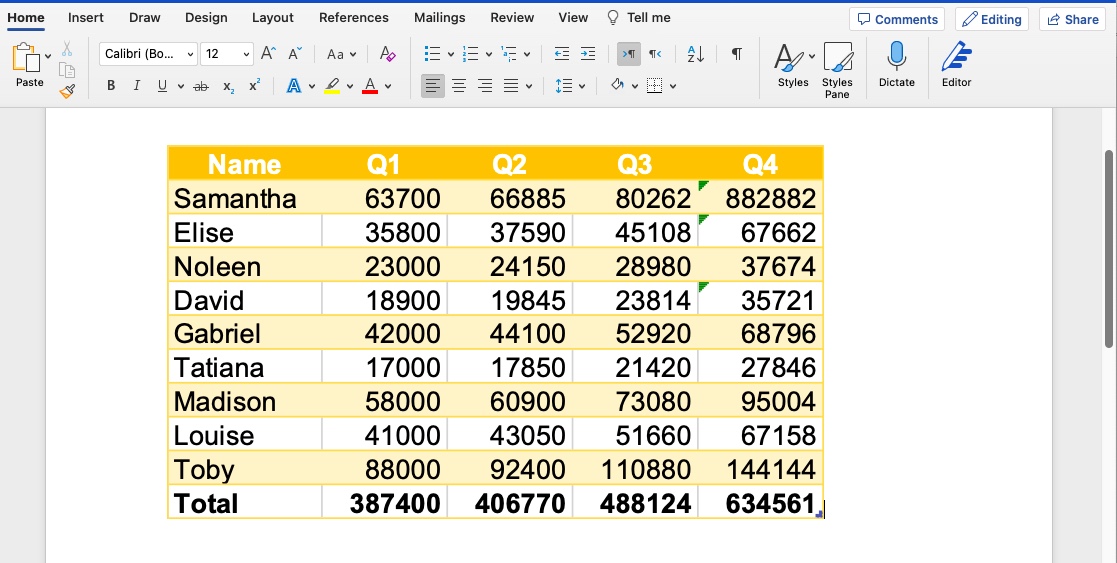
- Click the OK button. The table will then be pasted into the Word document as shown below:
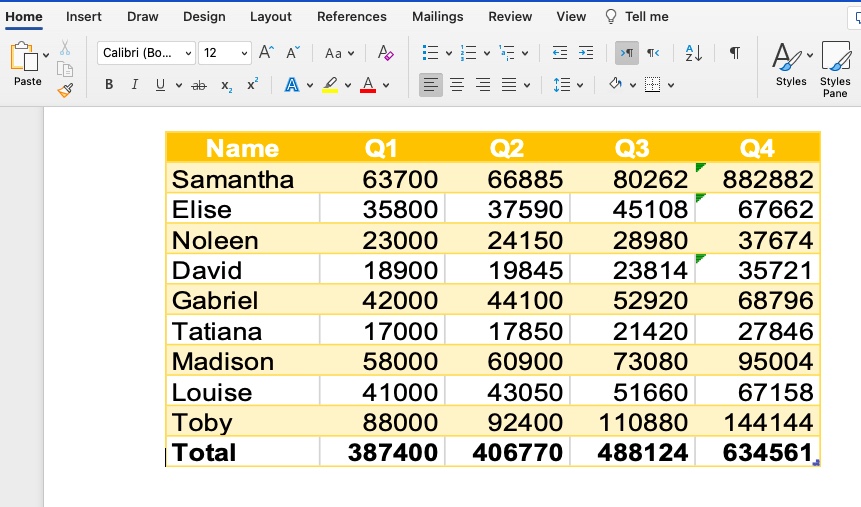

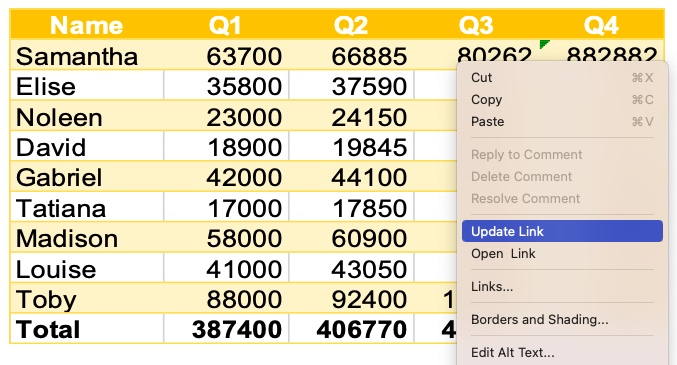
Since they are now linked, any time you make changes in Excel, it is automatically updated in Word. But if for some reason it does not, just click on “Update” when you right-click on the table.
Important Points
- If you want to share the Word document that contains the linked Excel table, you will also need to send the Excel document. If not, any update done on the Excel file will not automatically reflect on the Word file.
- Each time you open the Word file with the embedded Excel table, it automatically checks for any updates which will then be reflected in Word.
Embed Excel File to Word File
In contrast to the above which only links the Excel table as a linked object, this method allows embedding the file to the word file.
Instead of sending both the Word and Excel file together, embedding the Excel file will allow you to make edits in the Word document like you are working in Excel.
In short, you only need to send the Word document.
Let me illustrate it through this table:

Follow these steps to embed Excel into Word:
- Select the cells you wish to copy from Excel to the Word document.
- You can either press Ctrl + C (cmd + C for Mac users) or right-click on your mouse and click on Copy.
- Launch the Word document where you wish to paste the copied table.
- Once opened, place the cursor exactly where the table must be pasted. In the Home tab, there is a small arrow button near the Paste icon. Click on this.
- Click Paste Special.
- Select Paste instead of Paste Link in the Paste Special dialog box and then select Microsoft Excel Worksheet Object.
- Select Paste instead of Paste Link in the Paste Special dialog box and then select Microsoft Excel Worksheet Object.

Once the Excel file is copied into the Word file, you will see the table as the one shown below:
Double-click on the table and it will immediately open the Excel file. You can begin to edit the table and keep the formulas and formatting you have previously used.
The upside of using this method is you do not have to miss out on any updates on both files because they are linked so you will only need to send or receive the Word document.
Static Image Copy-Paste
This method is probably the most convenient if there is any need to make edits to the table and you want to keep it as is.
The advantage here is that the formatting and resizing of the image are fairly simple to do from Word. Another upside is the option to link the image copied to Excel. That way, when you make changes in the Excel file, it is also reflected in the image.
Still using the same table in our examples above, here are the steps:
- Select the cells you wish to copy from Excel to the Word document.
- You can either press Ctrl + C (cmd + C for Mac users) or right-click on your mouse and click on Copy.
- Launch the Word document where you wish to paste the copied table.
- Once opened, place the cursor exactly where the table must be pasted.
- In the Home tab, there is a small arrow button near the Paste icon. Click on this.
- Click Paste Special.

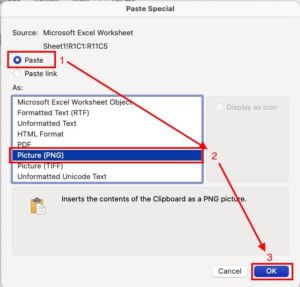
- Click “Paste” in the dialog box and then click on Picture. Click OK.

Here’s what the table will look like when pasted as a static image:

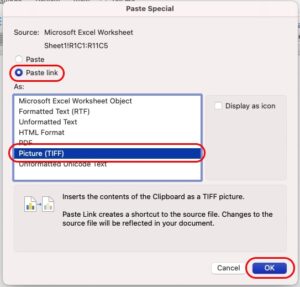
Copy as Linked Image
If you prefer to still be able to edit the Excel table and be free to format or resize the image in Word, you can copy the table as a linked image instead of a static image.
We will still use the same table as we have used above. Here are the steps to copy an Excel table as a linked image in Word:
- Select the cells you wish to copy from Excel to the Word document.
- You can either press Ctrl + C (cmd + C for Mac users) or right-click on your mouse and click on Copy.
- Launch the Word document where you wish to paste the copied table.
- Once opened, place the cursor exactly where the table must be pasted. In the Home tab, there is a small arrow button near the Paste icon. Click on this.


- Click Paste Special.
- Click “Paste Link” in the dialog box and then click on Picture. Click OK.

When you make any edits to the Excel table, it will be reflected in Word in real time. However, should you decide to share the file, you must send both the Excel and Word documents for the update to work.
Note that when you delete the Excel document or change its file name, the image linked to Word will function like all the other images pasted on Word.
Conclusion
The above are just some of the ways for you to copy an Excel table to Word. Next time you need to have a report that needs to be linked to an Excel table, you will know exactly the steps to do it.