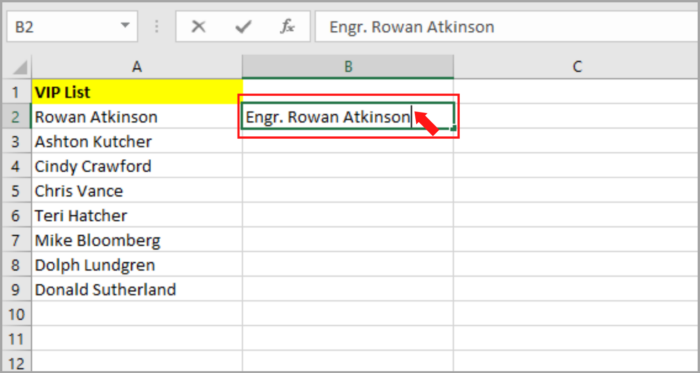
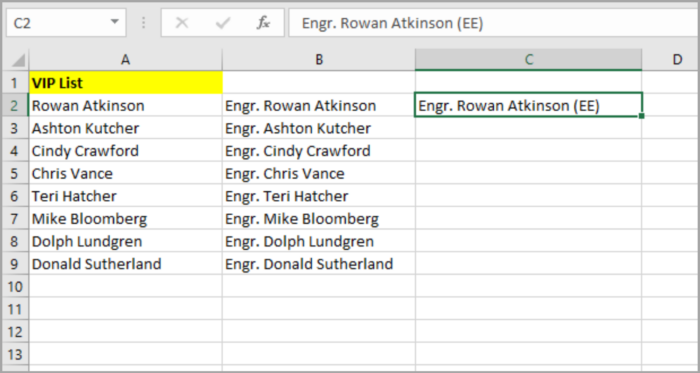
4 Methods of Adding Text to The Beginning or End of All Cells in Microsoft ExcelEasy Step-by-Step Guides
When you are working on a project in Excel, sometimes you need to add the same text to the rest of the cell in a particular column.
And occasionally, you need to add the title or symbol of a particular person before their name in every cell.
The good news is that Excel has an automation feature for this kind of problem.
This automation has many ways to help you in your project – one of these is by adding text to the beginning or end of the word in the cell.
Here are the 4 methods to apply this automation:
- By the Use of an Operator, ampersand (&)
- By the Use of a Function, CONCATENATE
- By the Use of a Feature, Flash Fill
- By the Use of Excel VBA (Visual Basic Analysis)
Let’s begin!
#1 Method: By the Use of an Operator, ampersand (&)
The ampersand (&) has many uses in Excel.
One of the main features of the ampersand is that you can combine two (2) words/characters located in different cells into a single cell.
Using Ampersand at the Beginning of the Cells
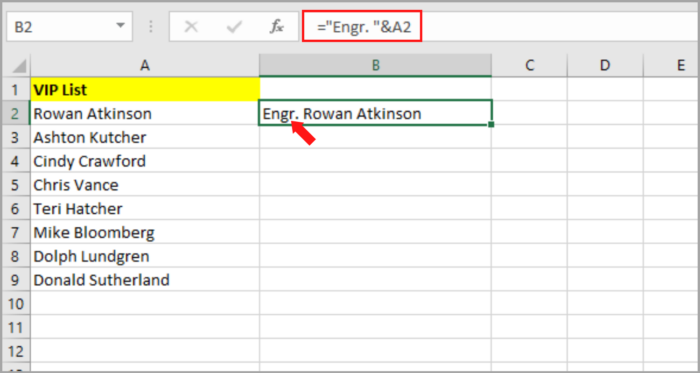
Here are some examples of how we can use the ampersand (&) in adding text to the beginning of the names shown below.
We are adding the text “Engr. ” to the names given:
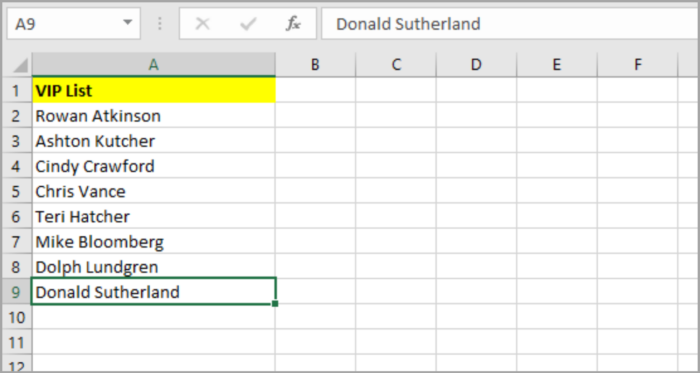
Here is the step-by-step process for adding the text before the names:
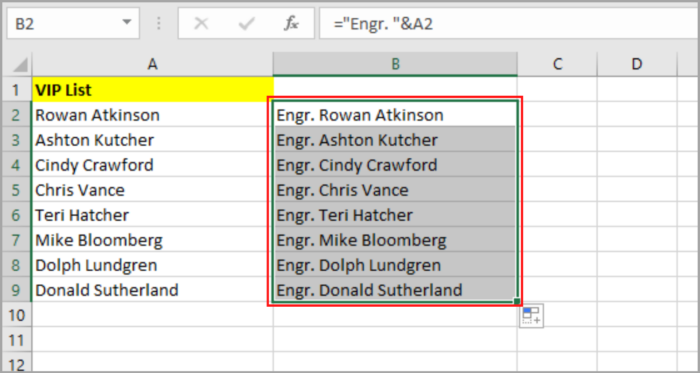
- Select the cell you want to place the converted names (B2).
- Type the character equal (=) followed by “Engr. “and lastly the ampersand (&).
- Click the name which is located in the A2 cell.
- Press the Enter key.
- Now you can see the name with the “Engr. ” at the beginning of the combined cell.

- After that, you will see the result in the B2 cell. You can copy the formula to the rest of the columns by clicking the cell and dragging the fill handle.
You should now see the names in the column with the title “Engr. ” before their names.
Using Ampersand at the End of the Cells
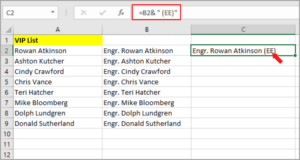
Here are some examples of how we can use the ampersand (&) in adding text to the end of the names as shown below.
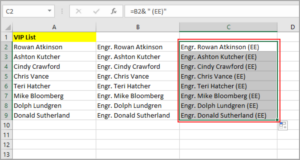
We are adding the text “(EE)” to the end of the names:
- Select the cell you want to place the converted names (C2)
- Then just type the character equal (=).
- Click the cell containing the name that you want to add (EE) at the end.
- Add the Ampersand (&), then type the (EE) text.
- Press the Enter key.
- Now you can see the name with the “(EE)” at the end of the combined cell.

- After that, you will see the result in the C2 cell. You can copy the formula to the rest of the column by clicking the cell and dragging the fill handle.
You should now see the names in the column with the “(EE)” after their names.
#2 Method: By the Use of a Function, CONCATENATE
CONCATENATE can be handy in adding text at the beginning and end of a word.
Let’s look at how CONCATENATE works!
Using CONCATENATE at the Beginning of the Cell
The CONCATENATE() Function has the same functionality just like the Ampersand (&) Operator.
The difference is in how you use it.
The formula for the CONCATENATE function:
=CONCATENATE(text1, [text2], …)
Text1 and text2 are the substrings that you will combine together.
Sometimes there are more texts that are given.
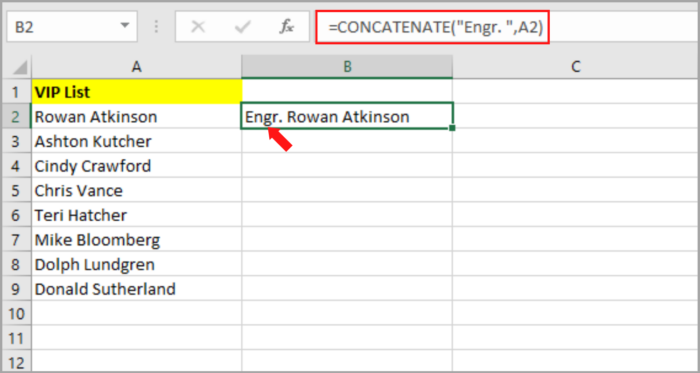
Let us use the same example above in applying how we can use the CONCATENATE method. Here is the step-by-step process:
- Select the cell you want to place the converted names (B2)
- Type the character equal (=).
- Enter CONCATENATE, then follow it by adding the open parenthesis (().
- Type “Engr. ” after the open parenthesis then follow it by adding the comma (,) character.
- Click the cell that contains the name (A2).
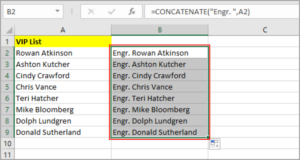
- Then type the close parenthesis ()). The formula should be: =CONCATENATE(“Engr. “,A2).
- Press the Enter Key.
- Now, you will see the “Engr. ” at the beginning of the name.

- After that, you will see the result in the B2 cell. You can copy the formula to the rest of the columns by clicking the cell and dragging the fill handle.
You should now see the names in the column with the “Engr. ” before their names.
Using CONCATENATE at the End of the Cells
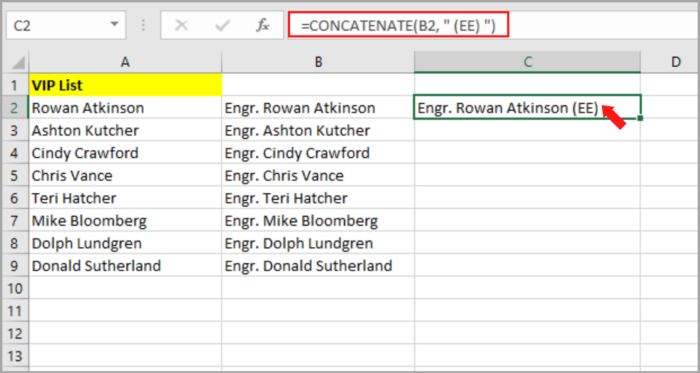
Here are some examples of how we can use CONCATENATE in adding text to the end of the names as shown below.
We are adding the text “(EE)” to the end of the names:
- Select the cell you want to place the converted names (C2).
- Type the character equal (=).
- Enter CONCATENATE, then follow it by adding open parenthesis (().
- Now click the cell that contains the name you want to add (EE) in its end (B2).
- Then insert the character comma (,), then follow it by typing (EE).
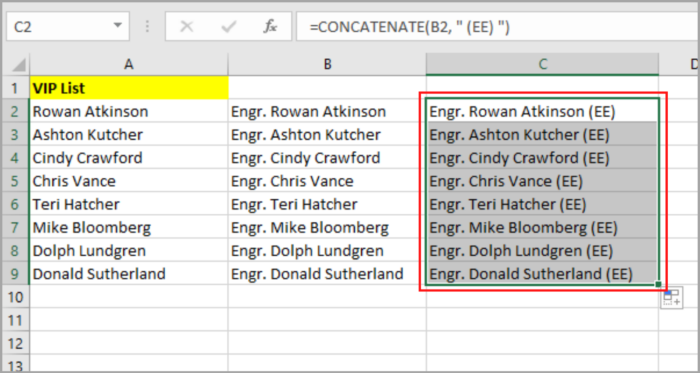
- Type the close parenthesis ()). The formula should be: =CONCATENATE(B2, “(EE)”.
- Press the Enter key.
- Now, you will see the “(EE)” at the end of the name.

- After that, you will see the result in the C2 cell. You can copy the formula to the rest of the columns by clicking the cell and dragging the fill handle.
You should now see the names in the column with the “(EE)” after their names.
The formula will depend on columns A and B. So, if you delete either one of the cells the result will reflect as an error.
You can see it in the picture below:
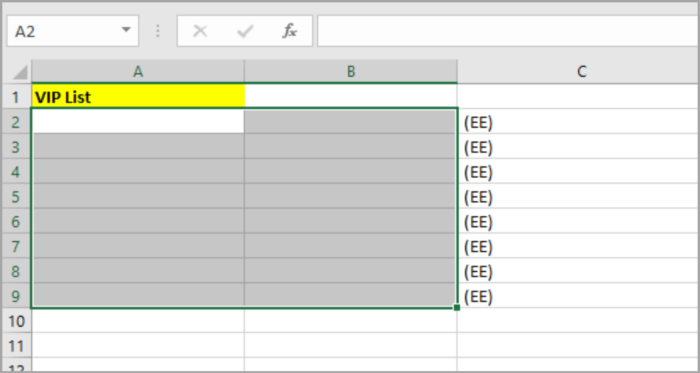
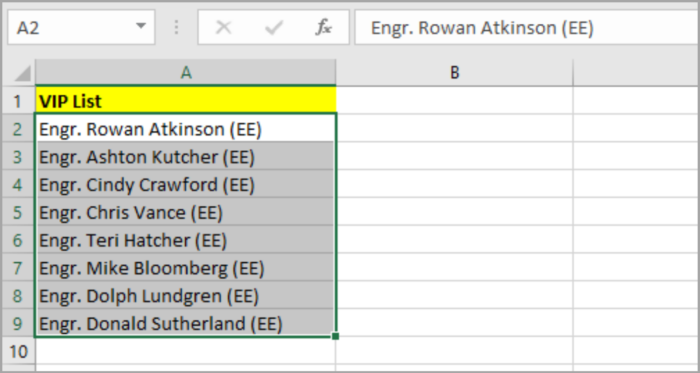
To prevent this to happen to your project, try converting it into permanent values by copying and pasting them as a value in the same column.
Select all the cells and copy and paste them using the Value option.
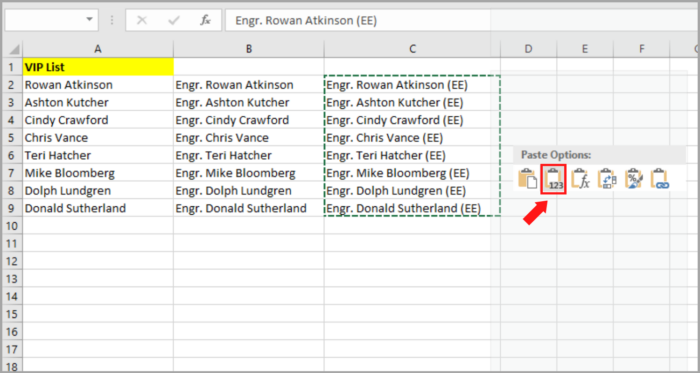
After this, you can now delete the A and B columns without affecting your result.
#3 Method: By the Use of a Feature, Flash Fill
This feature is a new feature in Excel. This is pattern-based so whatever you do to one cell will be applied to the other cells.
You can see how the flash fill feature works in manipulating the text in a cell.
Using Flash Fill at the Beginning of the Cells
The Flash Fill feature is very easy to use when working in Excel.
This feature is available in the version of Excel 2012 onwards.
Excel’s Flash fill feature has a pattern-based recognition ability.
This feature recognizes a pattern that you apply and then automatically applies it in another cell of the column that you are working on.
Here’s the step-by-step on how can you use the flash fill feature in adding text at the beginning of all the cells:
- Select the cell you want to place the converted names (B2).
- In that cell, manually type the word that you want to add. For our example, we are adding the word “Engr.”. Then, type the name.

- Press the Enter Key.
- Select the B2 cell once more.
- Go to the Data tab, then click the Flash Fill button. Or you can use the shortcut CTRL key + E or, for Mac users, you can use the CMD key + E.
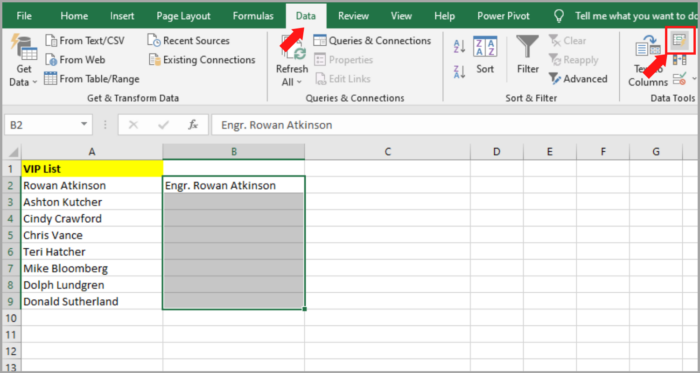
This easily copies the pattern to the rest of the cell in the column.
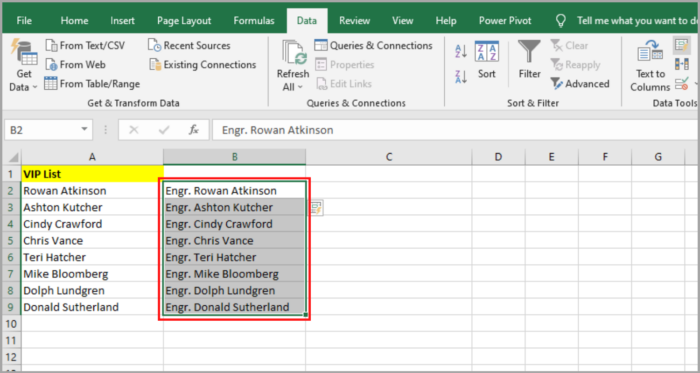
Using Flash Fill at the End of the Cells
Let’s try adding the text “(EE)” at the end of the name.
Here’s the step-by-step on how you can apply this method to the names below:
- Select the cell you want to place the converted names (C2).
- Then just type the name or try to copy the text in the B2 cell and paste it into the C2 cell.
- Add “(EE) at the end of the text.

- Go to the Data tab, then click the Flash Fill button. Or you can use the shortcut CTRL key + E.
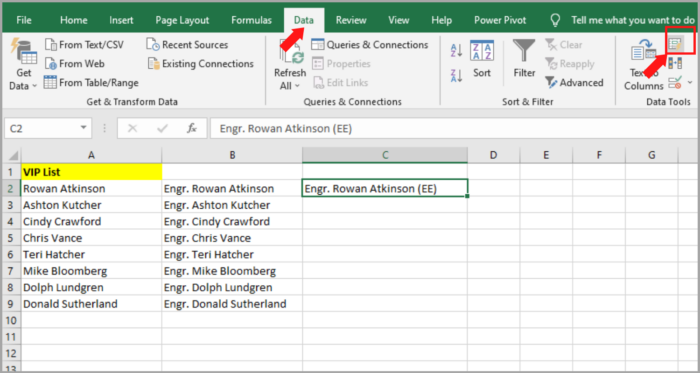
This easily copies the pattern to the rest of the cell in the column.
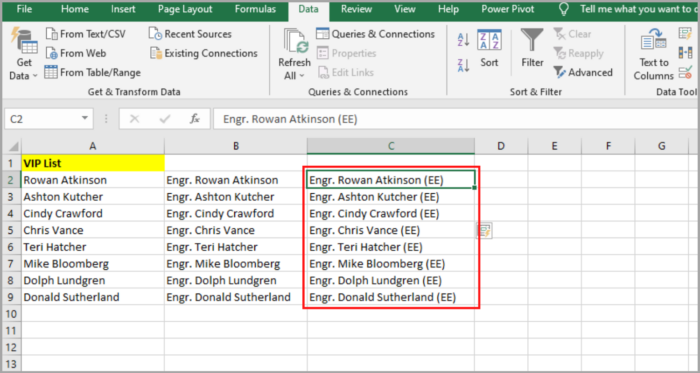
This is the simplest way of adding text before and after the names that are given.
This is a formula-free method and this method does not depend on the A and B columns, unlike in the CONCATENATE method.
So you can easily edit or delete the unnecessary cell or columns any time you want.
#4 Method: By the use of the Excel VBA Code (Visual Basic Analysis)
The last method is VBA.
This method can be used to add text before and after a text.
Using Excel VBA at the Beginning of the Cells
If you are familiar with Coding, you can use this method. This can help you finish your work fast.
Here’s the script we will use to add “Engr. ” to the cells within a specific range. Simply copy this script:
| Sub add_text_to_beginning() Dim rng As Range Dim cell As Range Set rng = Application.Selection For Each cell In rng cell.Offset(0, 1).Value = “Engr. ” & cell.Value Next cell End Sub |
Here is the step-by-step process for using this code:
- Go to Developer Menu Ribbon, then click Visual Basic.
- If the VBA window is open, just click the Insert->Module. You can now start the coding process by typing or copying and pasting the script that is given earlier. If you are finished, the code is now ready to run.
- Select the range of the names. Make sure the cell on the right is blank because this is where the converted name will be placed.
- Go to Developer->Macros->add_text_to_beginning->Run.
You will now see the result of using VBA.
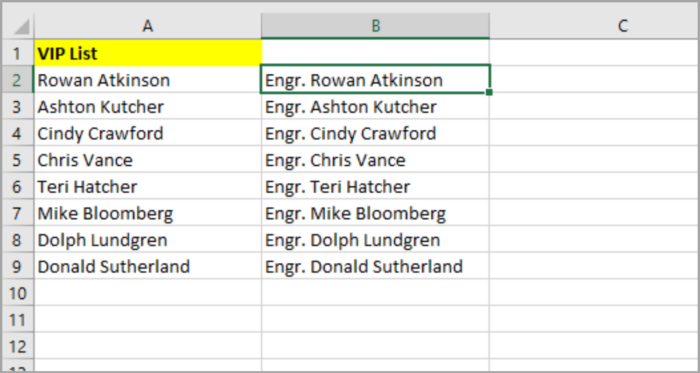
Note that you can change the word that you want to add in line 6.
Using Excel VBA at the End of the Cells
If you want to change the location of the text that you are using, that is possible to do. For example, we used “Engr. ” at the beginning of the name, and should you want to add “(EE)” at the end of the name, you just need to tweak the code that we used earlier. Specifically, we are changing line 6 to:
cell.Offset(0, 1).Value = cell. Value & “ (EE)”
Here’s the code that we will now be using:
| Sub add_text_to_end() Dim rng As Range Dim cell As Range Set rng = Application.Selection For Each cell In rng cell.Offset(0, 1).Value = cell.Value & ” (MD)” Next cell End Sub |
Here is the step-by-step process for using this code:
- Go to Developer Menu Ribbon. Then click Visual Basic.
- If the VBA window is open, just click the Insert->Module. You can now start the coding process by typing or copying and pasting the script that was given earlier. If you are finished, the code is now ready to run.
- Select the range of the names. Make sure the cell on the right is blank because this is where the converted name will be placed.
- Go to Developer->Macros->add_text_to_beginning->Run.
You will now see the final result of using VBA.
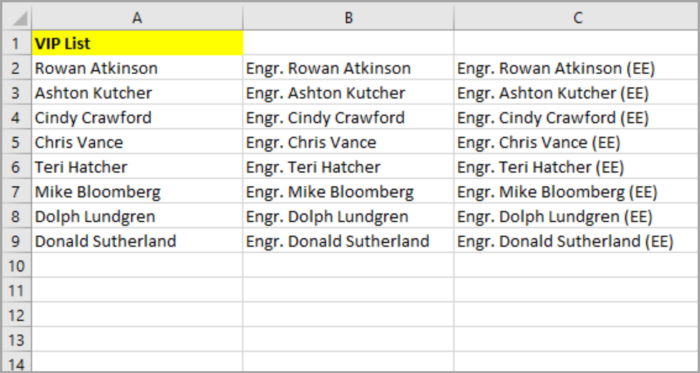
After this, you can now delete the first (A) and second column (B). Make sure that you do a backup of your spreadsheet because the VBA code is irreversible.
Note that you can change the word that you want to add inline 6.
Conclusion
In this tutorial, we learned about the different methods of adding text at the beginning and end of the names that were given.
We also used many methods to add text at the beginning and end of the words in the cell.
All of this works perfectly and efficiently – you just simply choose what you are going to use.
Before you use this method make sure that your Microsoft Excel is updated. Because not all versions of Excel have this feature.
I hope this demonstration helps you with your projects!

